Setup Network Infrastructure
Creating Your VPC Environment
ℹ️ Information: In this section, we’ll create a Virtual Private Cloud (VPC) with public and private subnets across multiple Availability Zones to ensure high availability for our Auto Scaling architecture.
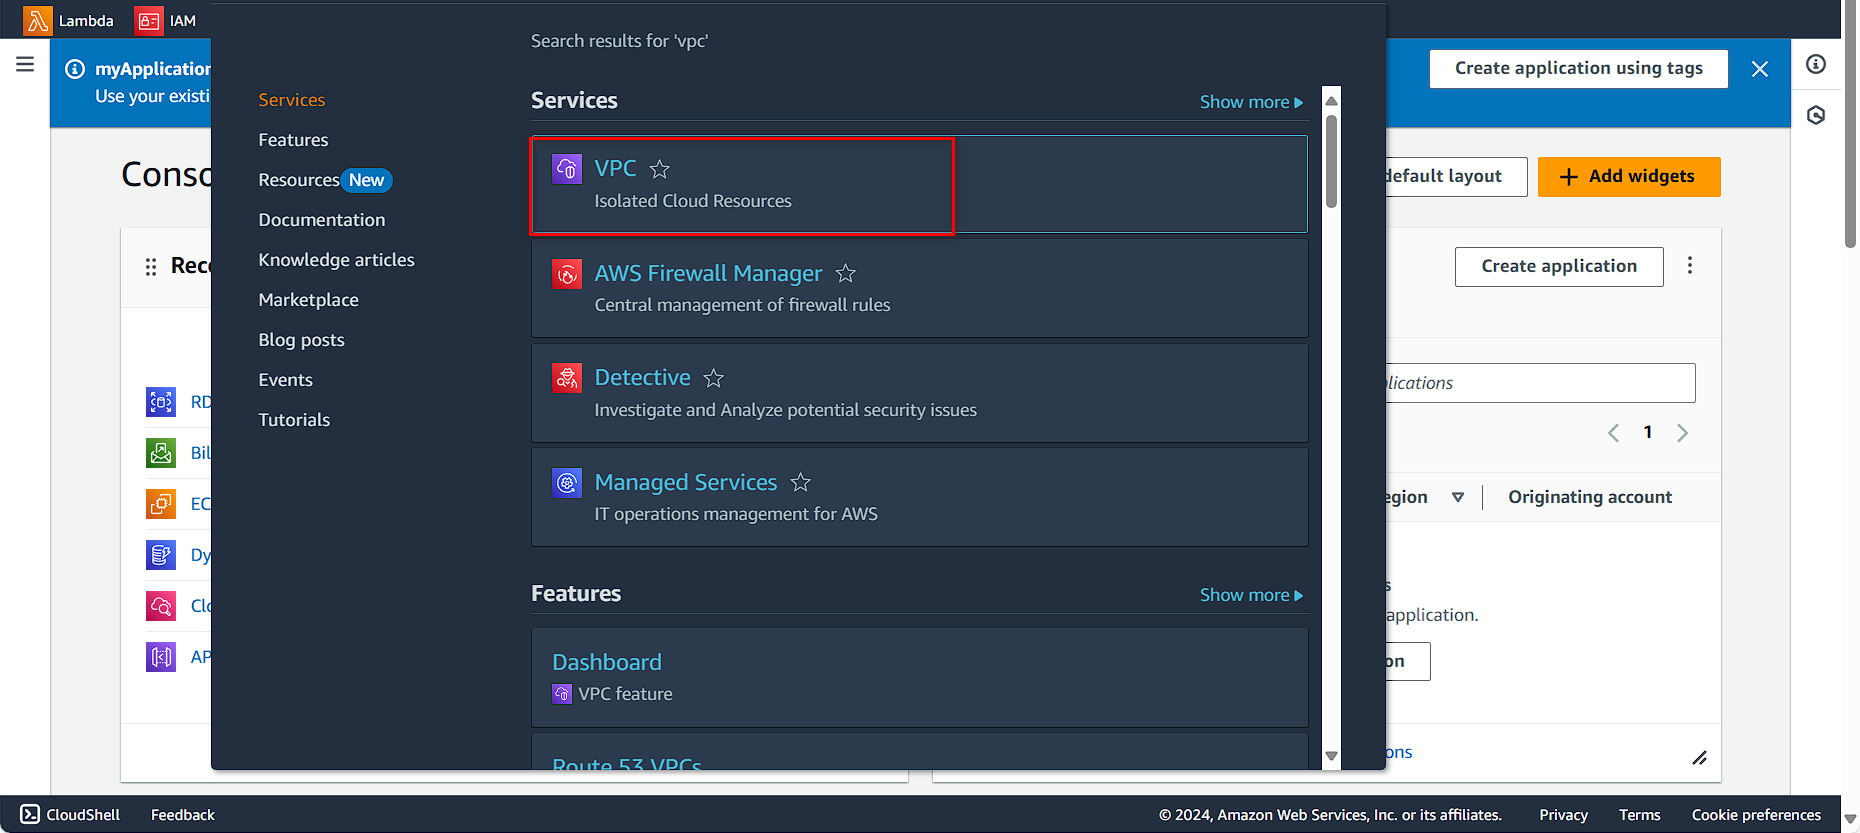
Navigate to the AWS Management Console
- In the search bar, find and select VPC
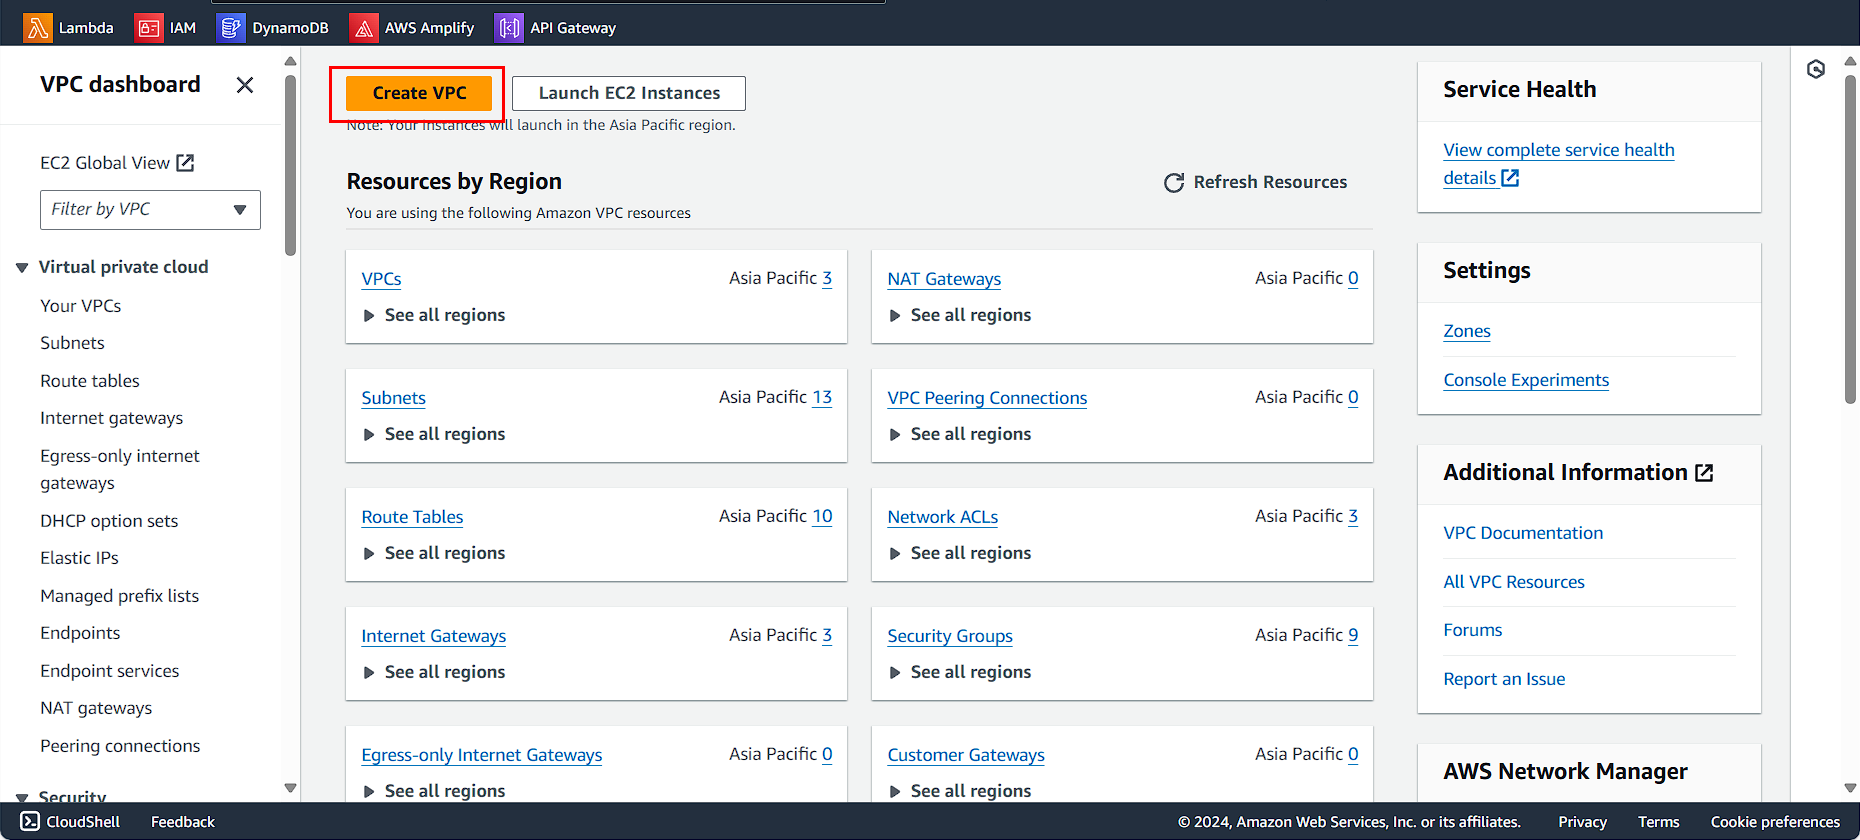
In the VPC Console:
- Click Create VPC
In the Create VPC interface:
- Select VPC and more for the comprehensive setup wizard
- For VPC name, enter
AutoScaling-Lab - For IPv4 CIDR block, enter
10.0.0.0/16

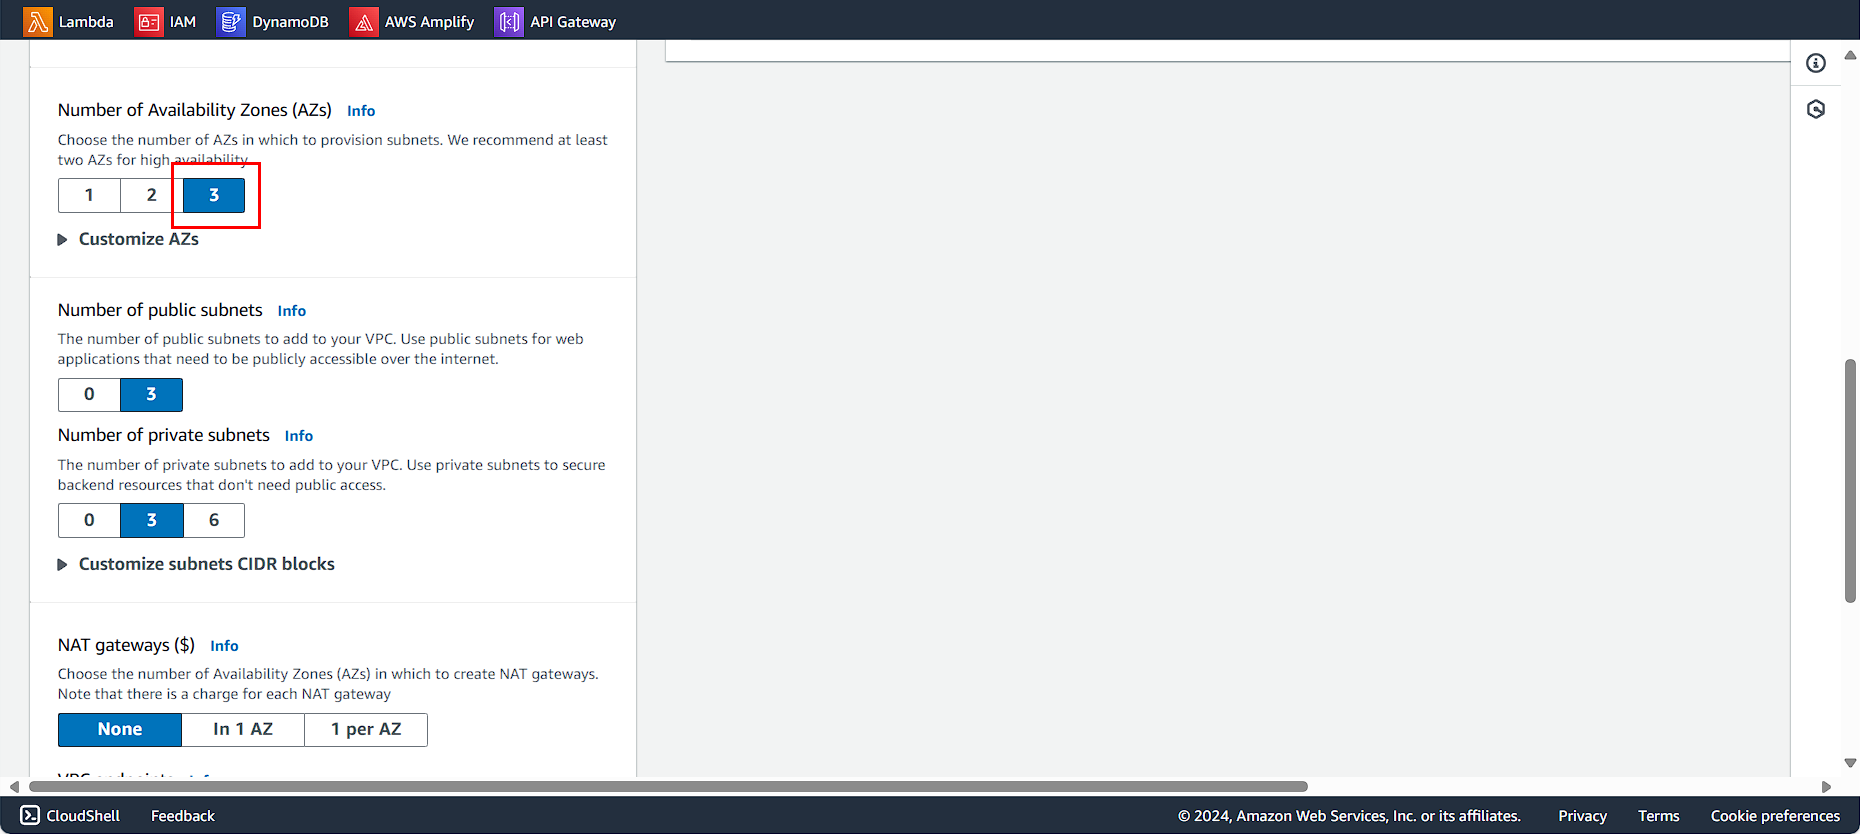
Configure the VPC architecture:
- Number of Availability Zones: 3 (for maximum resilience)
- Number of public subnets: 3 (one per AZ)
- Number of private subnets: 3 (one per AZ)
- NAT gateways: None (we’ll keep costs minimal for this lab)
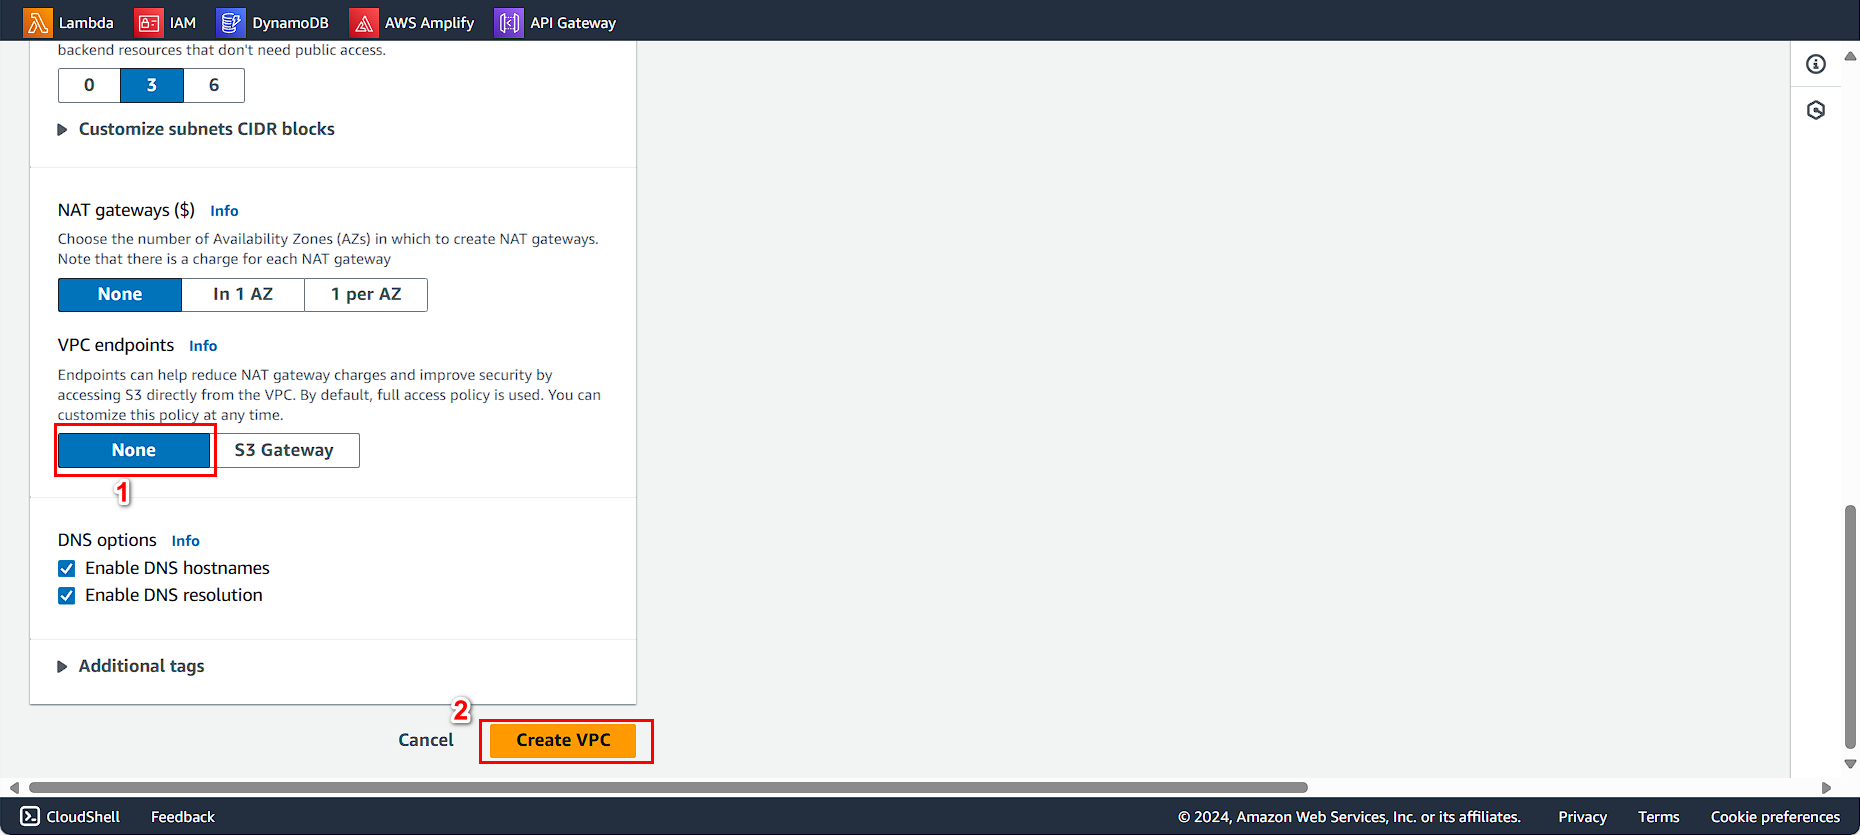
Finalize the VPC creation:
- VPC endpoints: None
- Click Create VPC
Configuring Public Subnet Auto-Assignment
ℹ️ Information: For EC2 instances in public subnets to receive public IP addresses automatically, we need to enable auto-assign public IPv4 addresses.
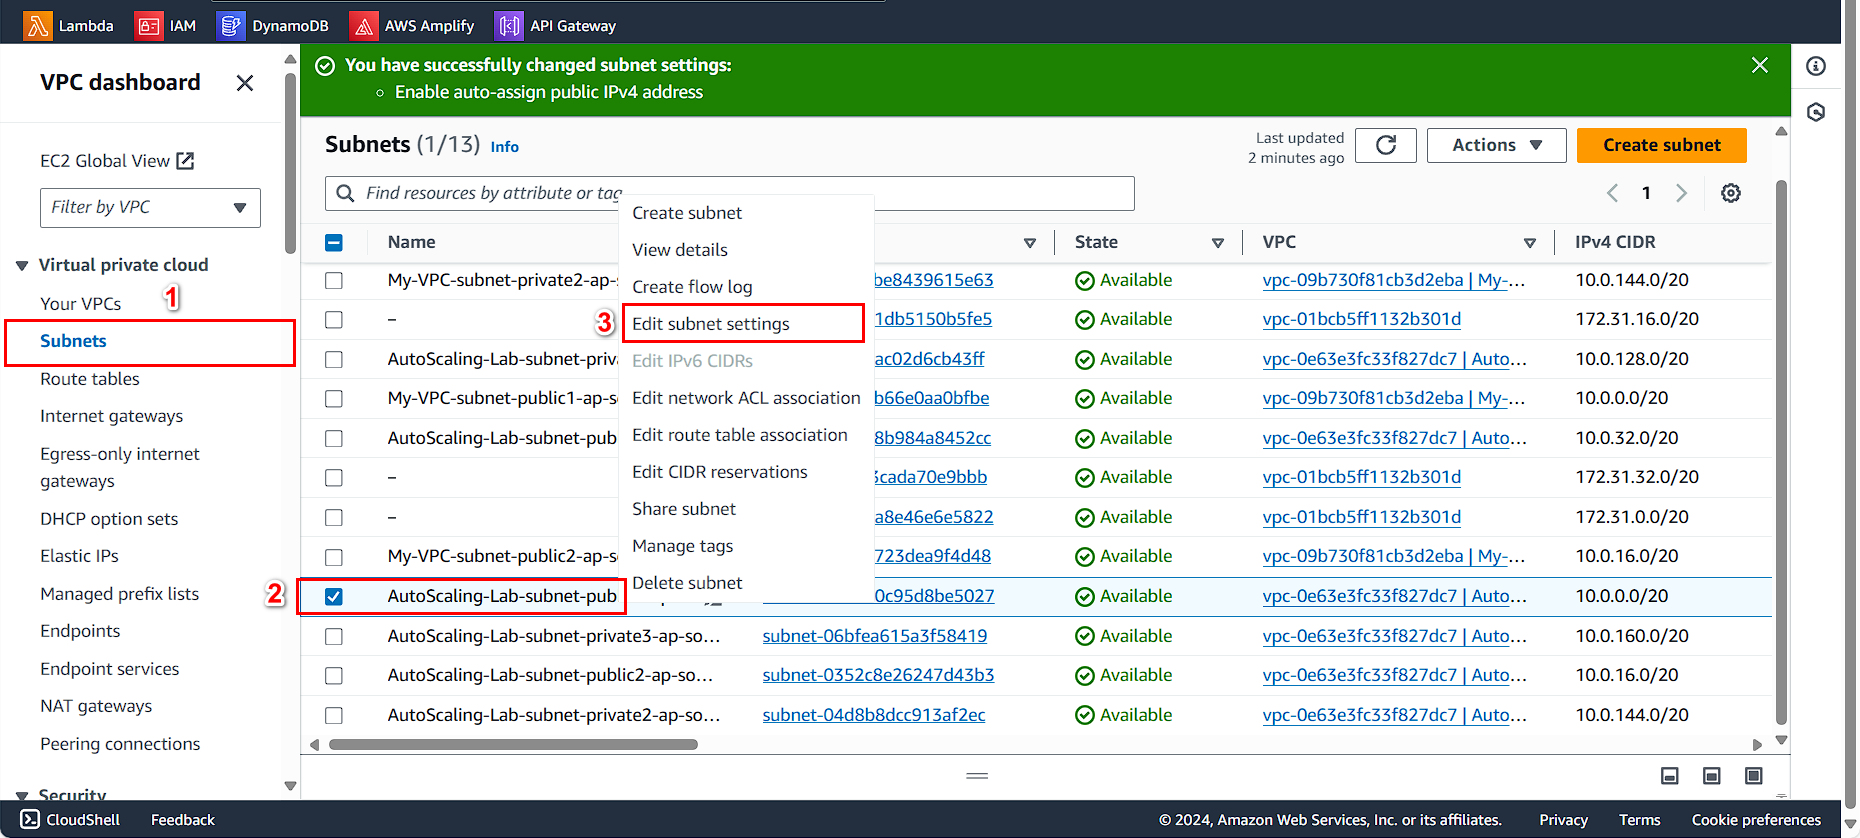
To enable auto-assign public IP:
- Select Subnets in the left navigation
- Select a public subnet
- Click Edit subnet settings
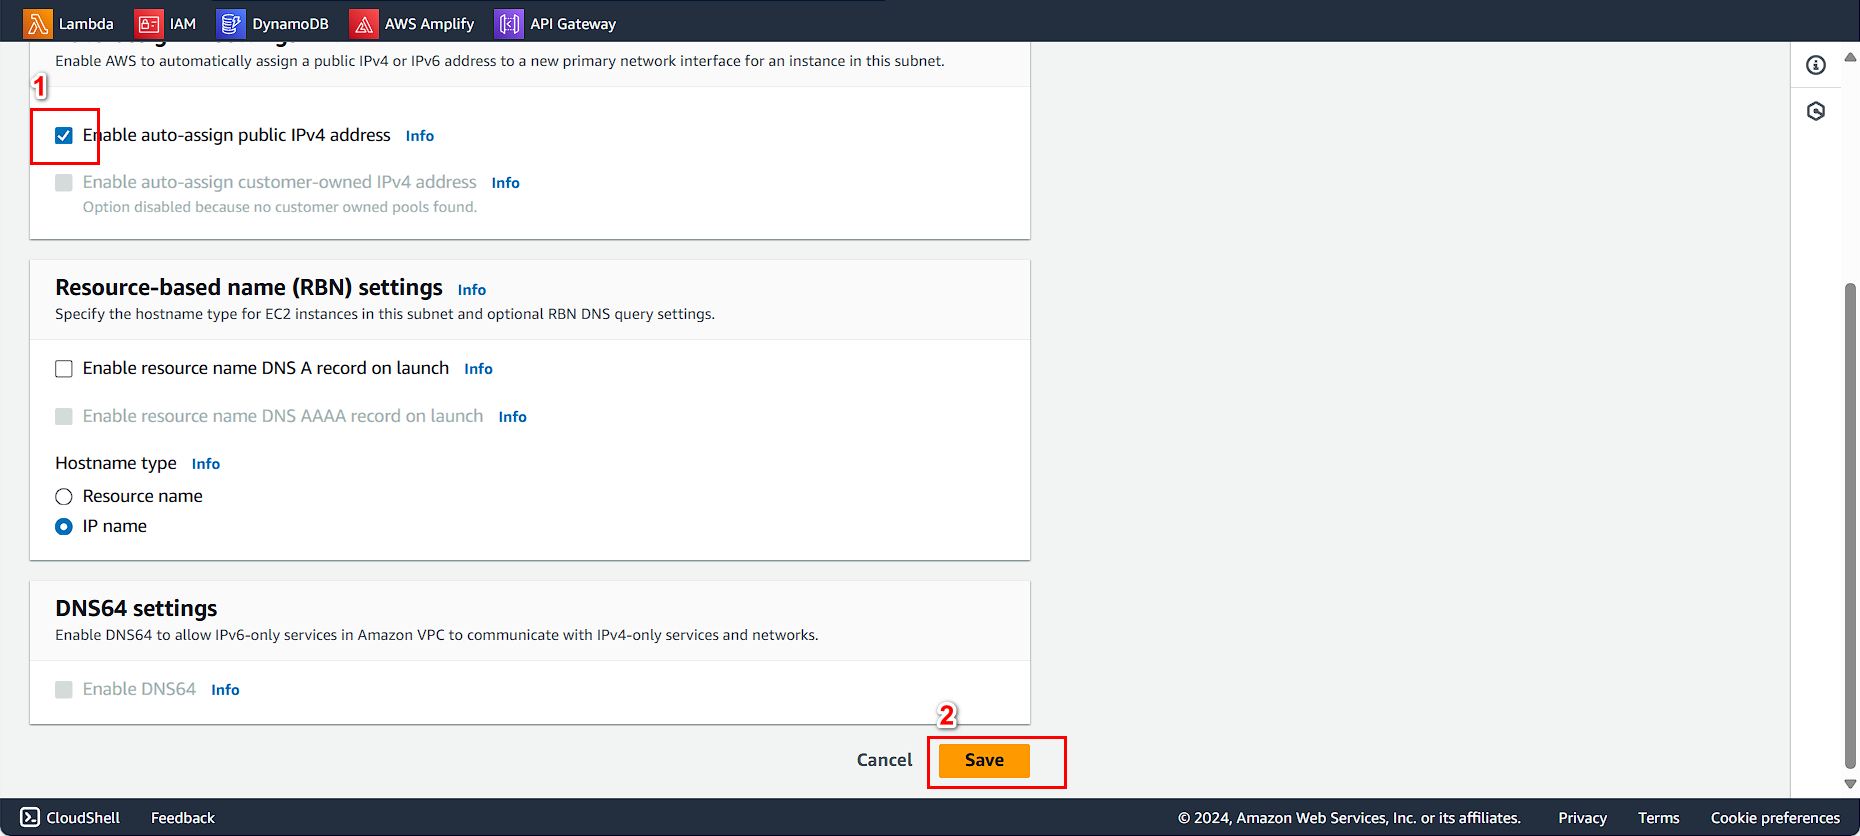
In the subnet settings:
- Check Enable auto-assign public IPv4 address
- Click Save
Verify the configuration was successful:

💡 Pro Tip: Repeat this process for all public subnets to ensure any EC2 instance launched in these subnets automatically receives a public IP address.
Creating Application Security Group
ℹ️ Information: Security Groups act as virtual firewalls for your instances to control inbound and outbound traffic.
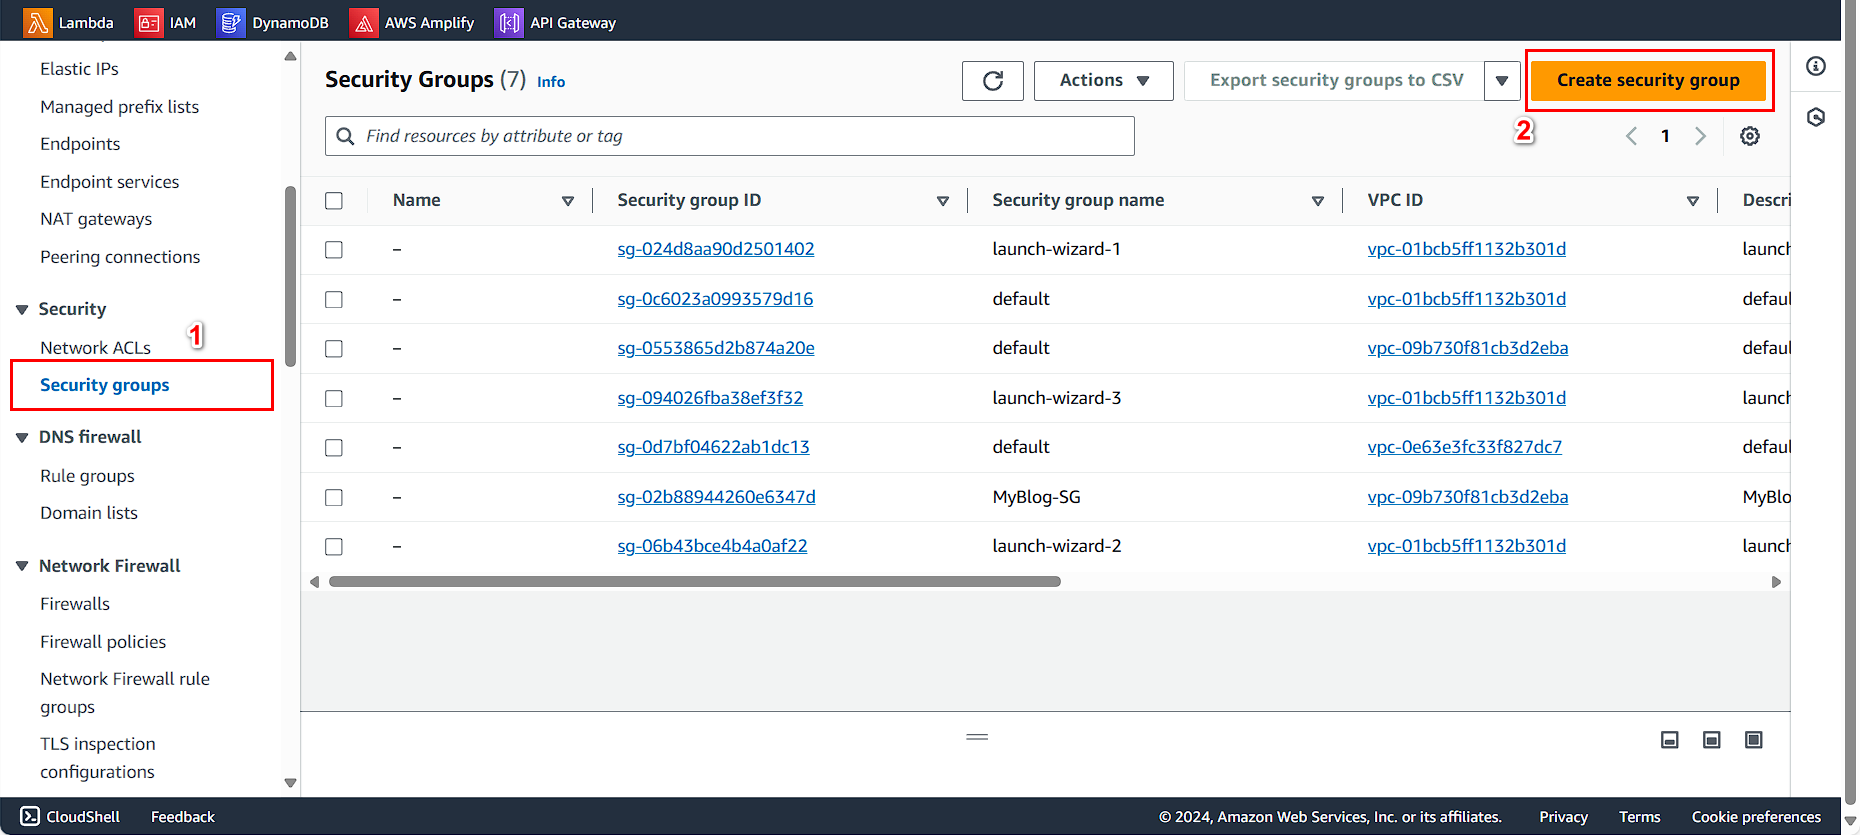
To create a security group for your application:
- In the VPC console, select Security groups
- Click Create security group
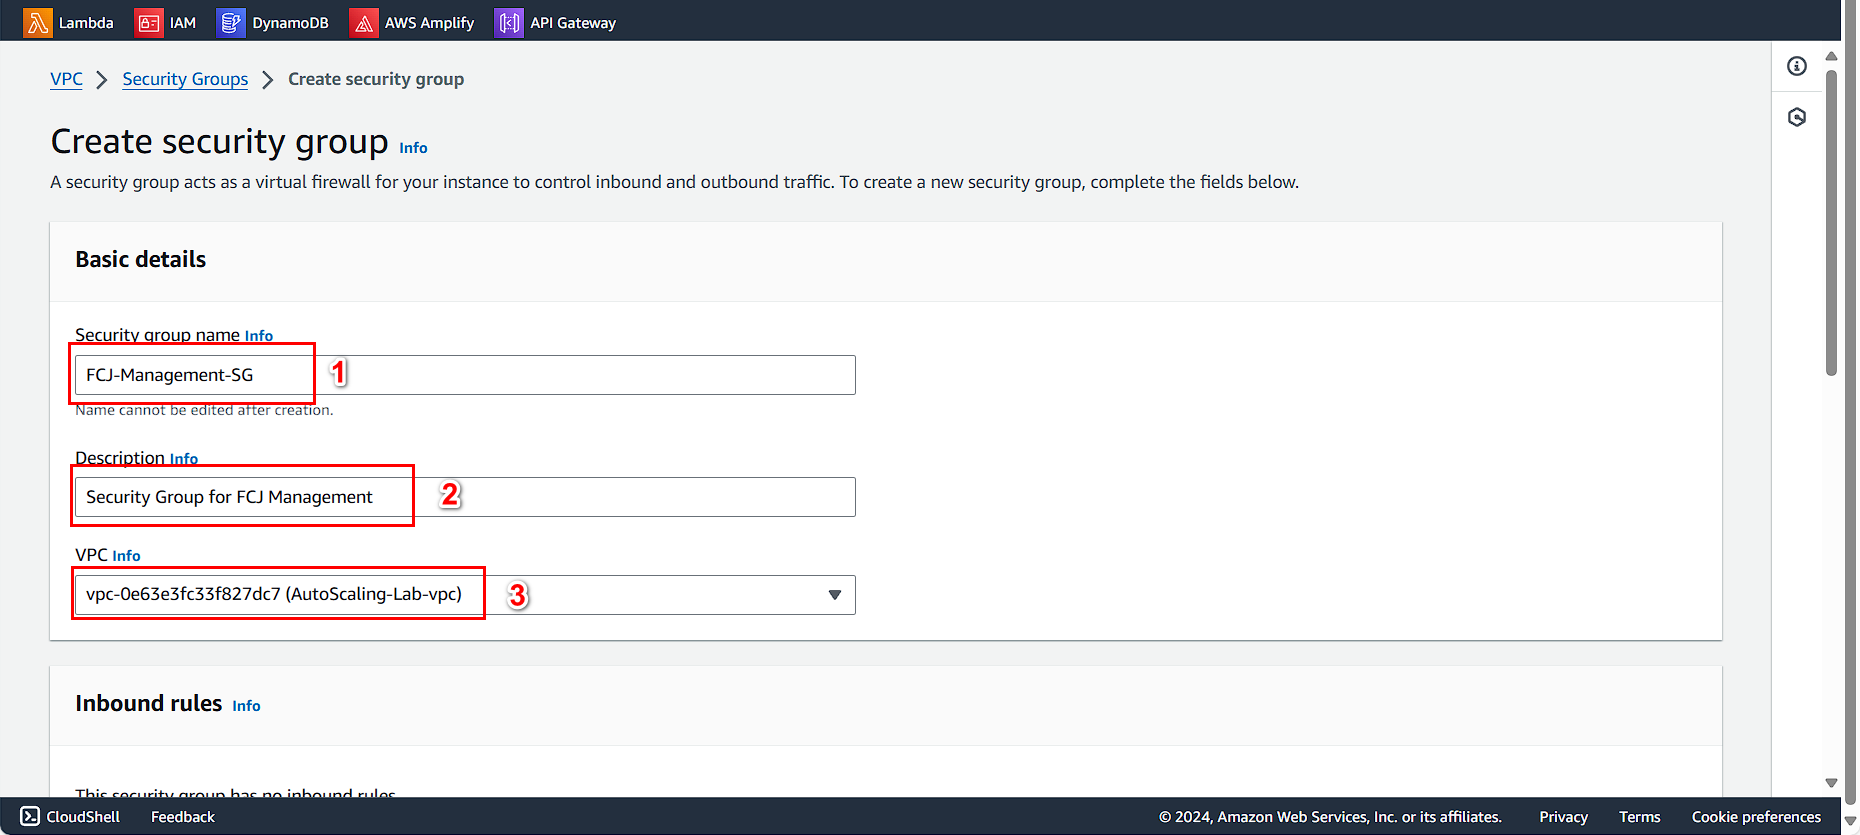
Configure the basic security group details:
- Security group name:
FCJ-Management-SG - Description:
Security Group for FCJ Management - VPC: Select the AutoScaling-Lab VPC you created
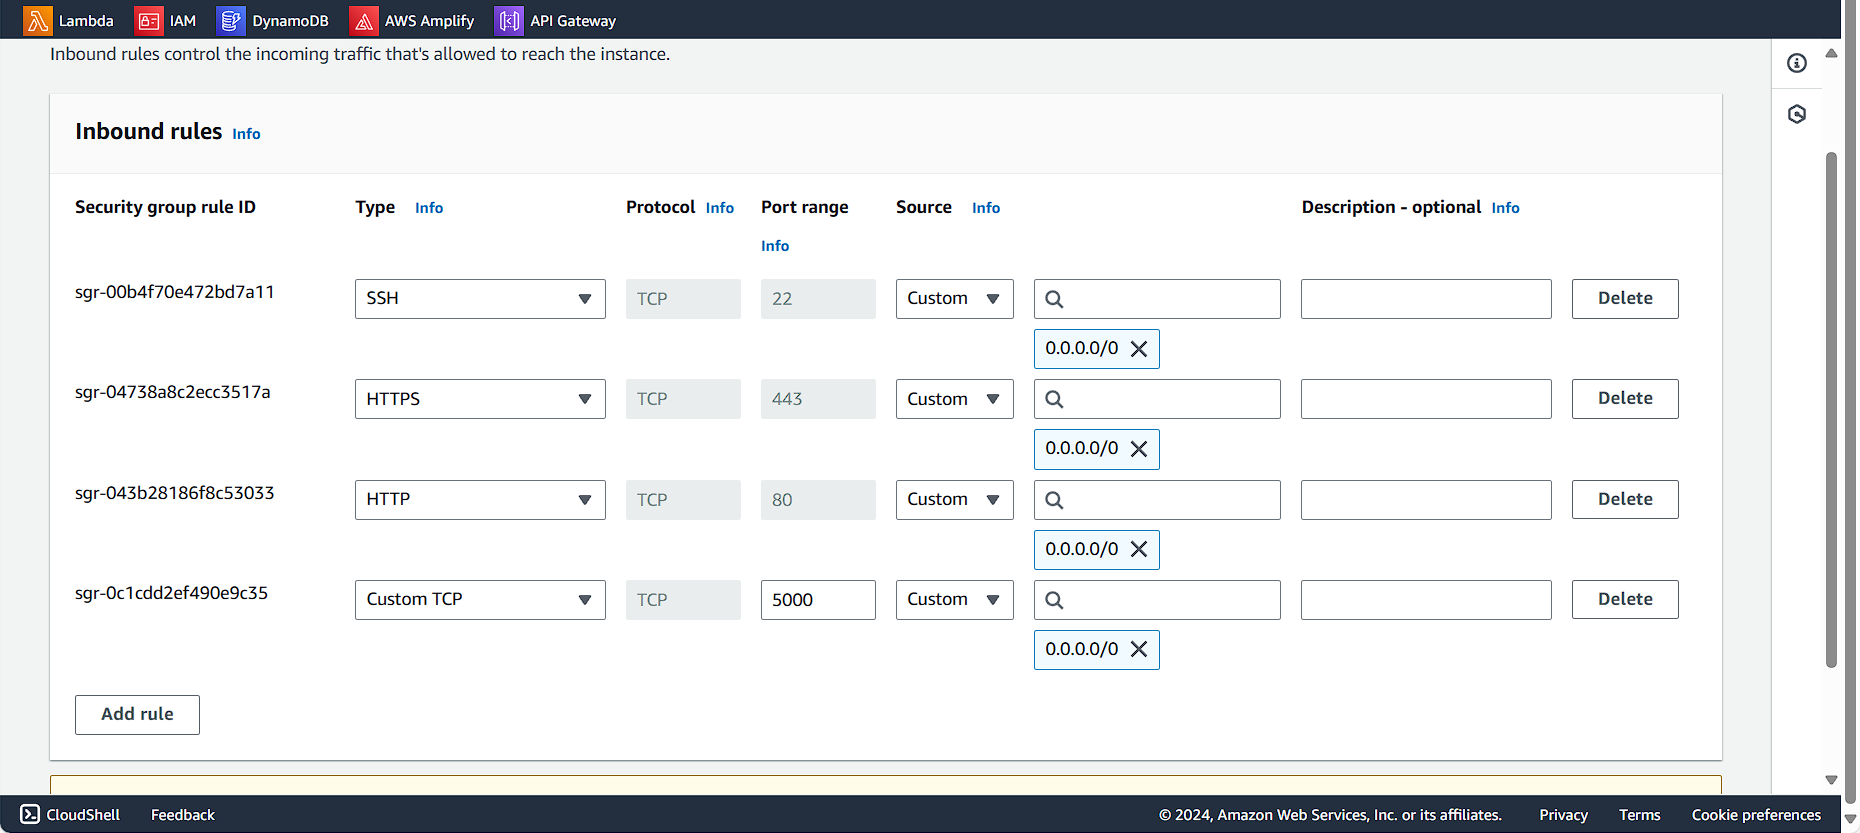
Configure the inbound rules:
- Add rule for SSH (port 22) with Source: My IP for secure administrative access
- Add rule for HTTP (port 80) with Source: Anywhere-IPv4 for web traffic
- Add rule for Custom TCP (port 5000) with Source: Anywhere-IPv4 for the FCJ Management application
- Add rule for HTTPS (port 443) with Source: Anywhere-IPv4 for secure web traffic
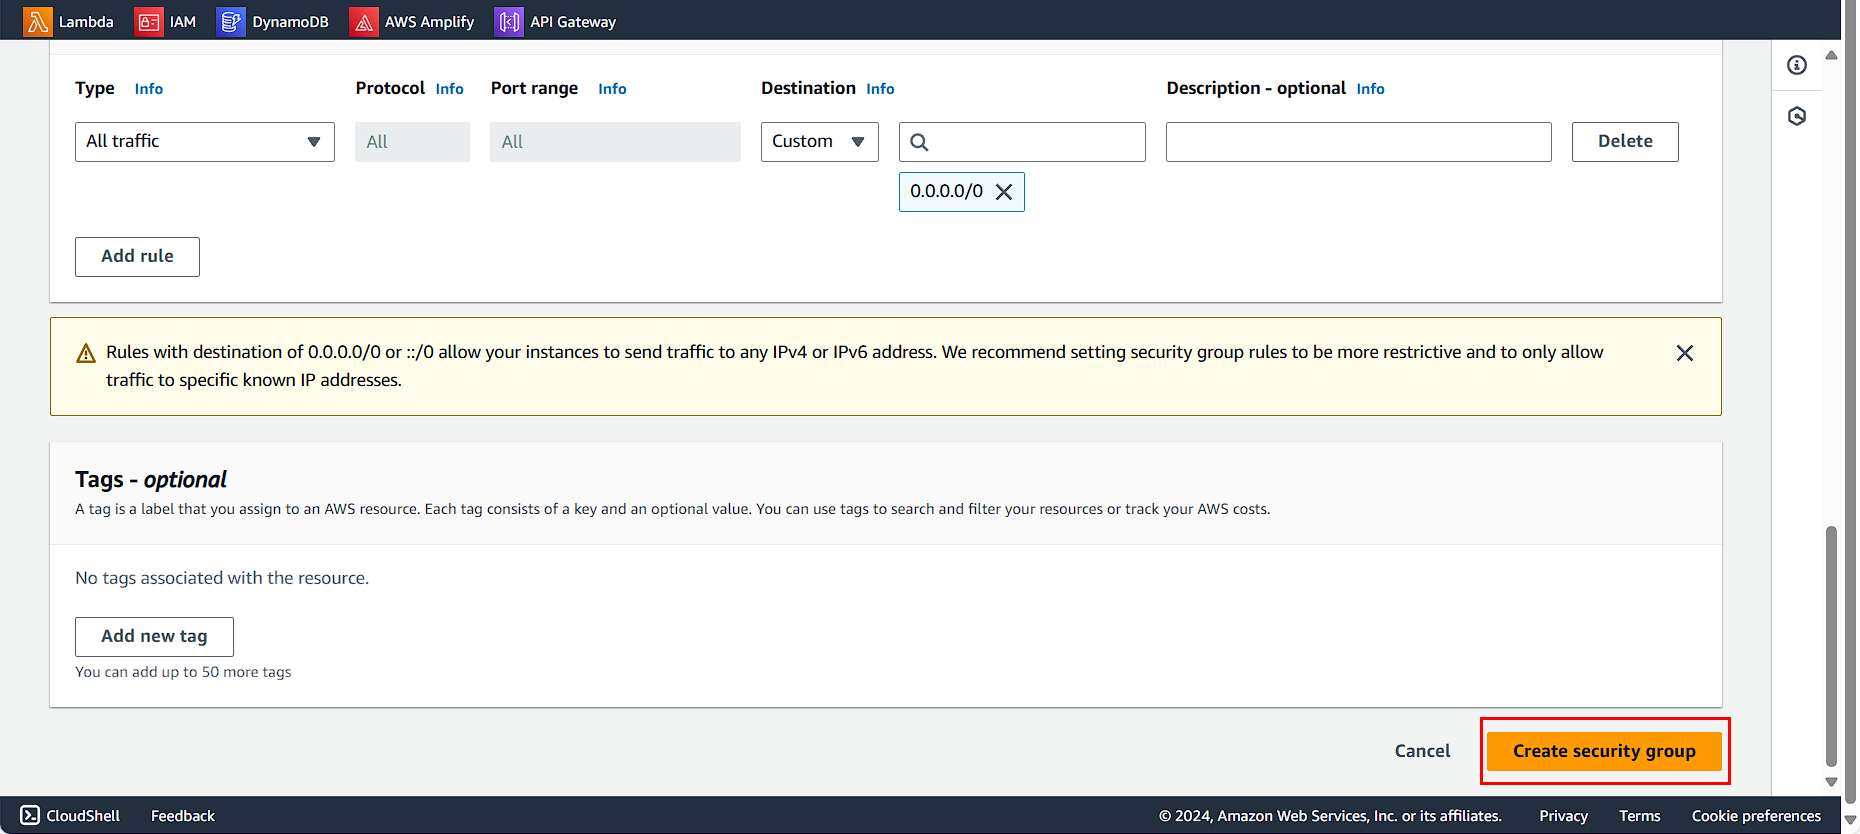
🔒 Security Note: In a production environment, consider restricting access to specific IP ranges rather than using “Anywhere” for enhanced security.
Review the outbound rules (default allows all outbound traffic) and click Create security group
Creating Database Security Group
ℹ️ Information: For database instances, we’ll create a separate security group with more restrictive access controls to enhance security.
Configure the database security group:
- Security Group name:
FCJ-Management-DB-SG - Description:
Security Group for DB instance - VPC: Select your AutoScaling-Lab VPC
Configure the inbound rules:
- Add rule for MYSQL/Aurora (port 3306)
- Set the source to the application security group FCJ-Management-SG
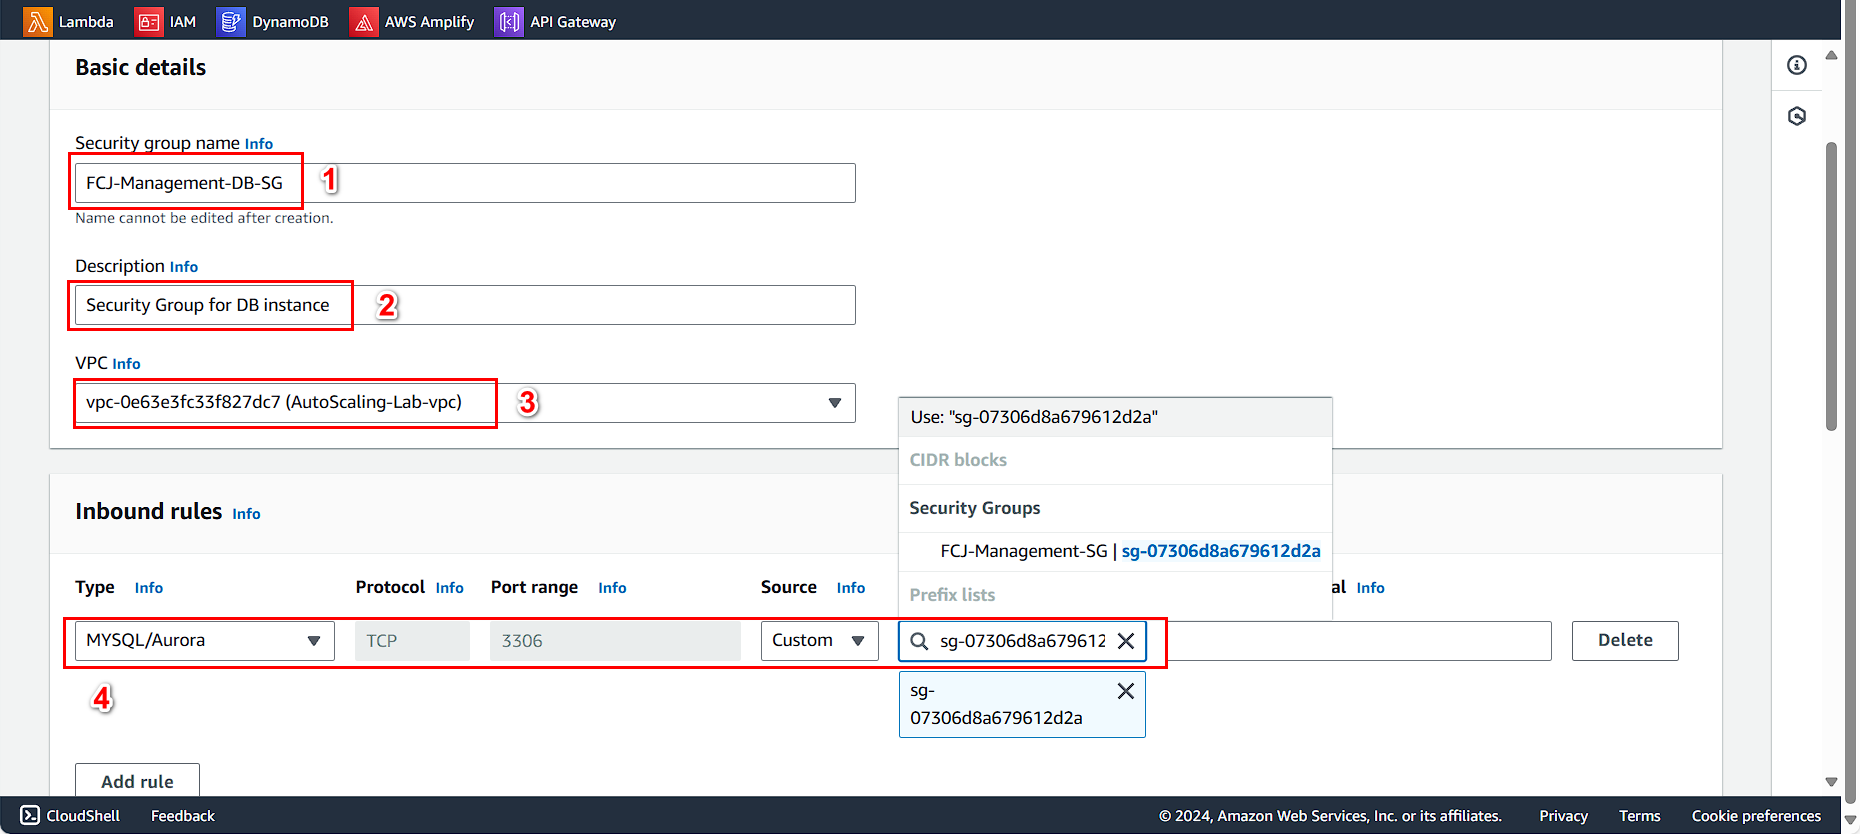
🔒 Security Note: By referencing the application security group as the source, you ensure that only EC2 instances with that security group can access the database, following the principle of least privilege.
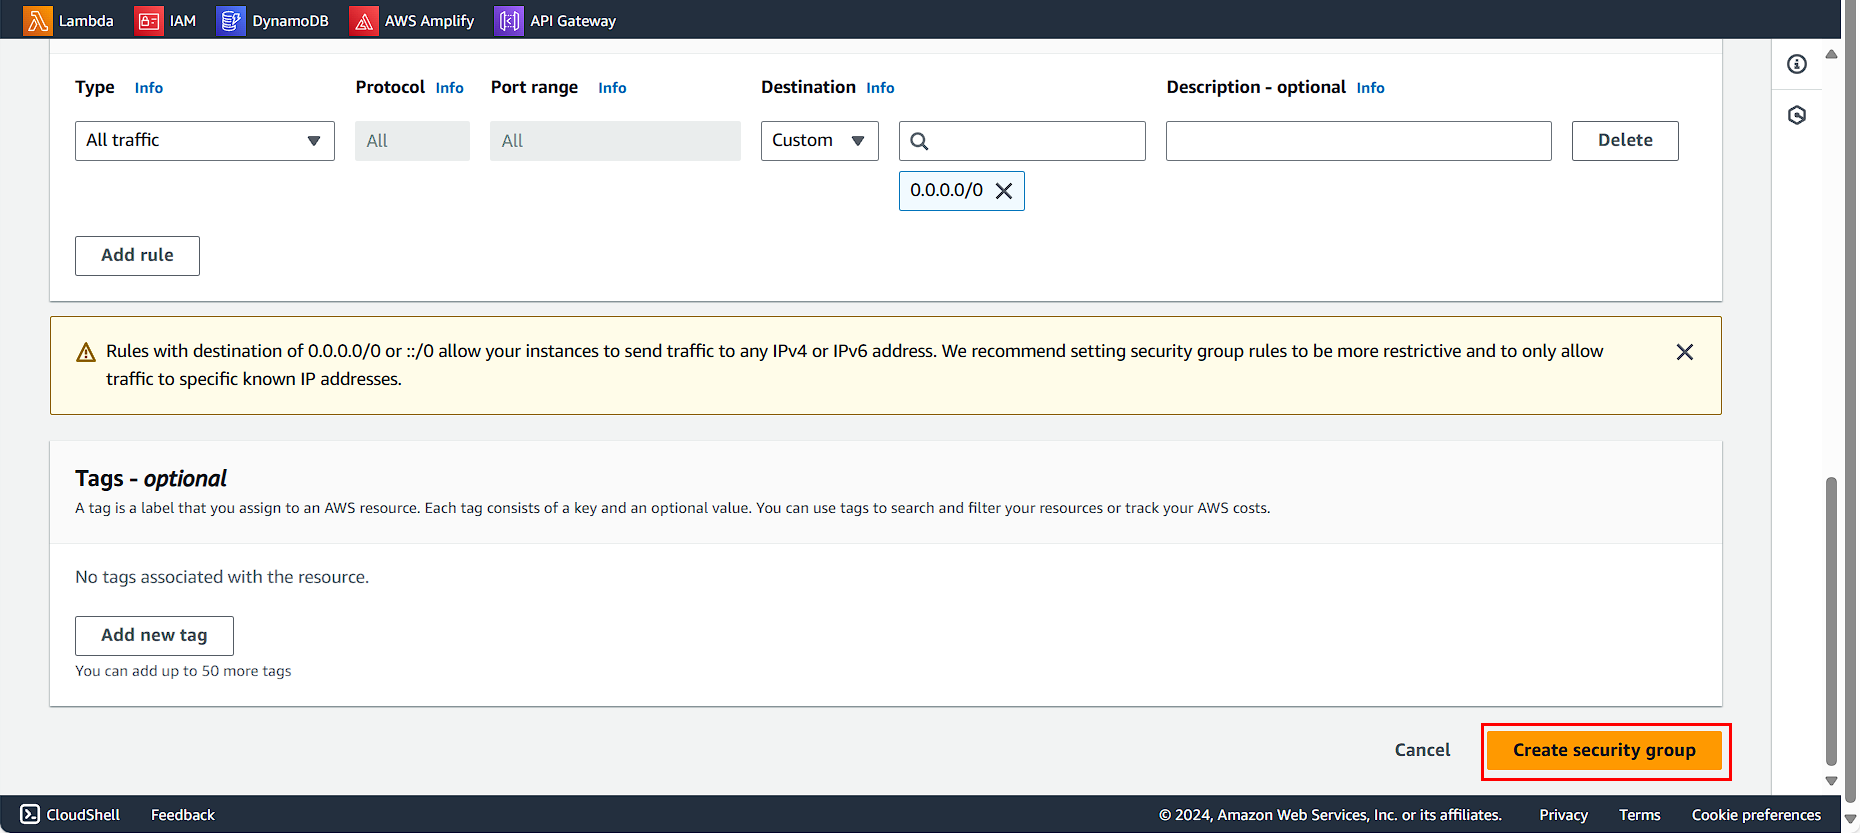
Review the outbound rules and click Create Security Group
💡 Pro Tip: This network architecture with separate security groups for application and database tiers follows AWS Well-Architected best practices for security and isolation.