Create Auto Scaling Group
Overview
ℹ️ Information: Auto Scaling Groups automatically adjust your application’s compute capacity based on demand, ensuring optimal performance while controlling costs. In this section, we’ll configure an Auto Scaling Group to dynamically manage our EC2 instances behind the Application Load Balancer.
Understanding the Need for Auto Scaling
⚠️ Warning: Our testing revealed performance instability when the application receives high traffic volumes. While manually adding EC2 instances and distributing traffic with a Load Balancer helps, this approach is impractical for several reasons:
- Each new instance requires manual configuration with the application and dependencies
- Responding to traffic fluctuations requires constant monitoring
- Manual scaling cannot efficiently respond to unexpected traffic spikes
Auto Scaling solves these challenges by automatically adjusting capacity based on defined policies.
Creating an Auto Scaling Group
Navigate to the Auto Scaling Group creation interface:
- In the EC2 management console:
- Scroll down the left navigation panel
- Select Auto Scaling Groups
- Click Create Auto Scaling group
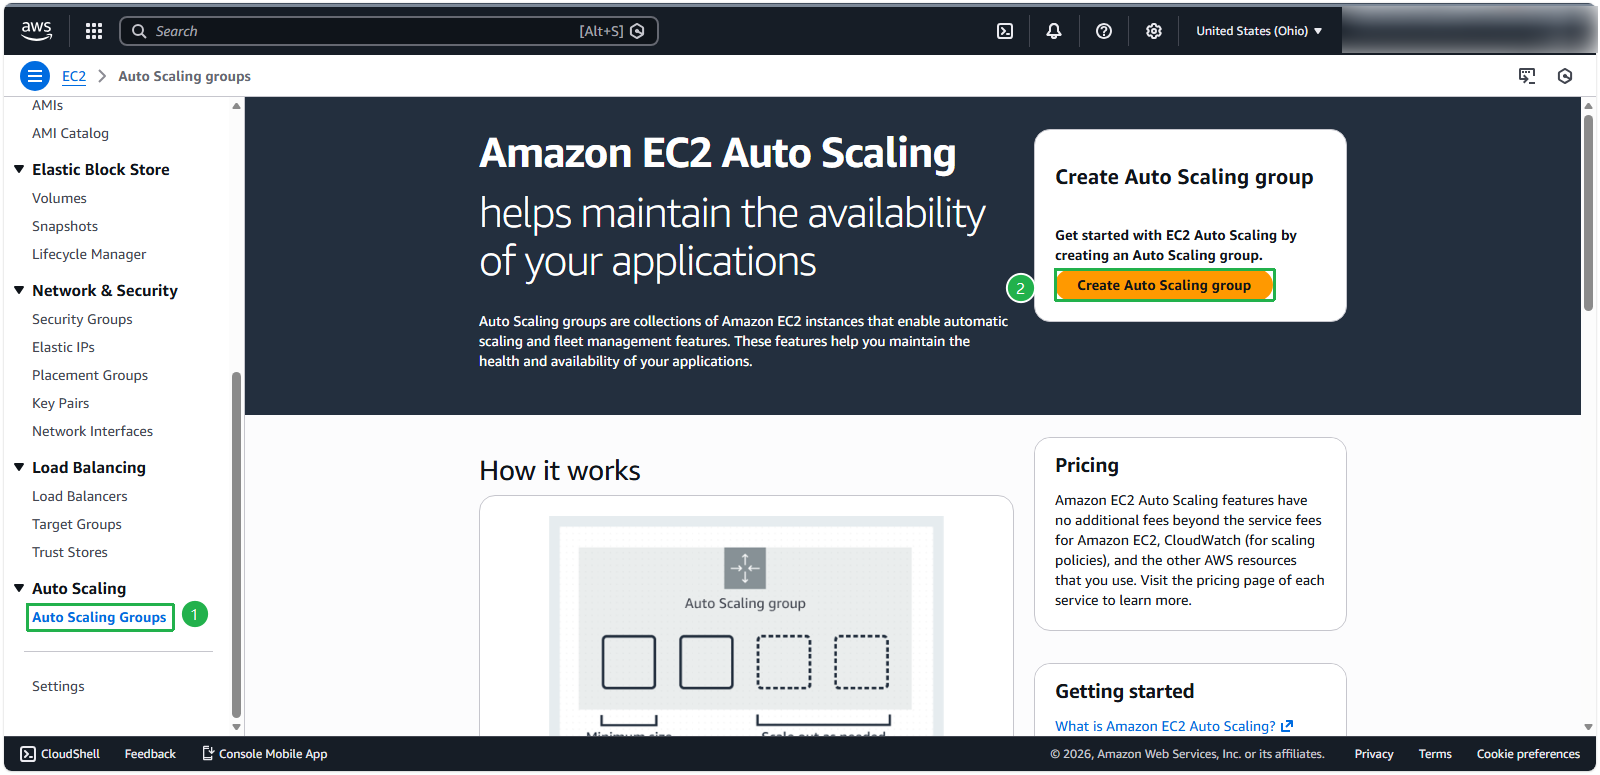
Configuring Launch Template
In the Auto Scaling group creation wizard:
- Basic configuration:
- Name:
fcaj-asg - Launch template: select fcaj-template
- Version: Default (1)
- Name:
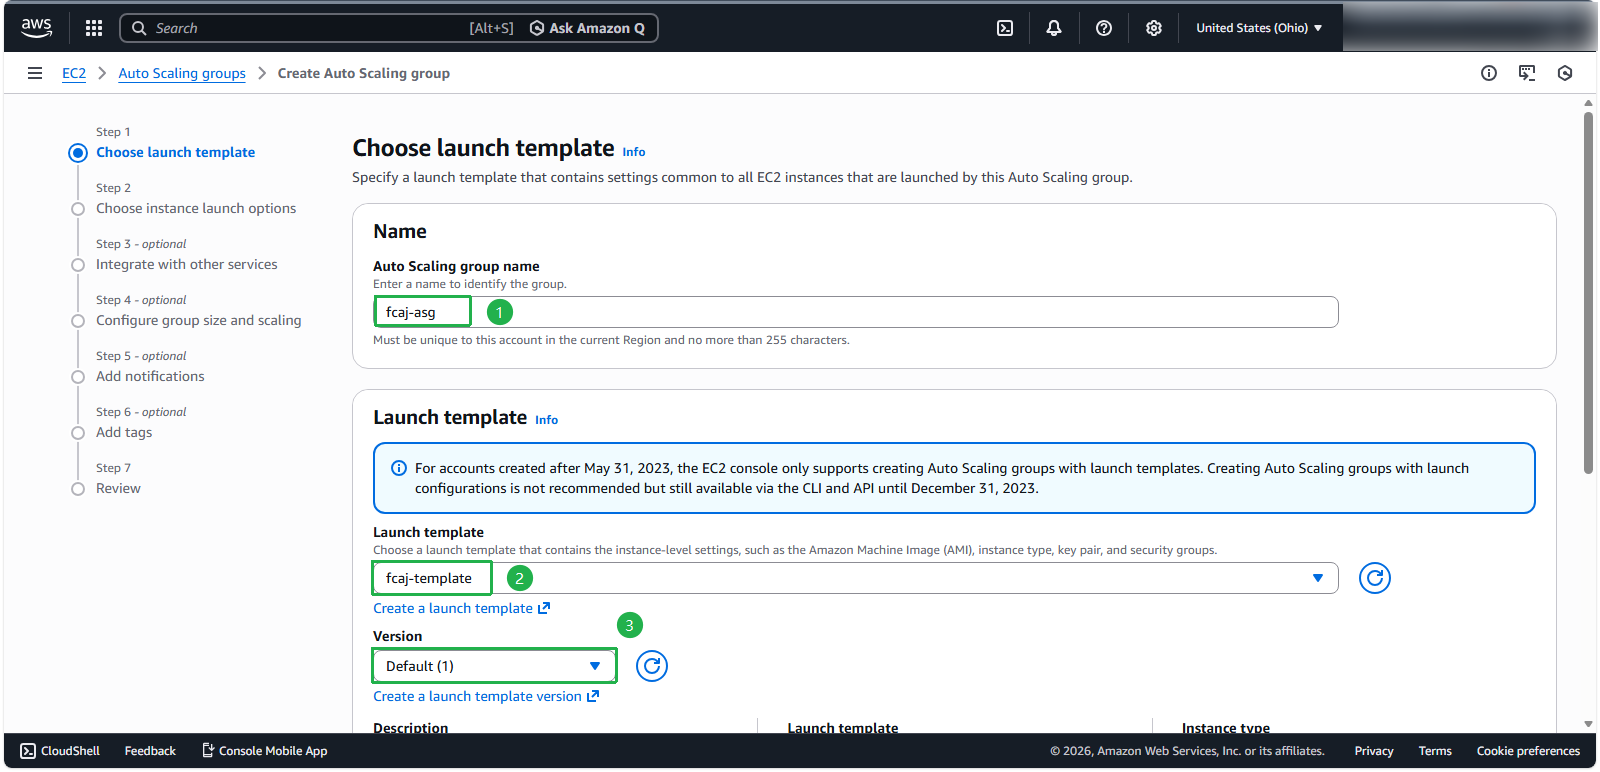
ℹ️ Information: The launch template contains all the configuration details needed to launch instances, including the AMI, instance type, key pair, security groups, and user data scripts.
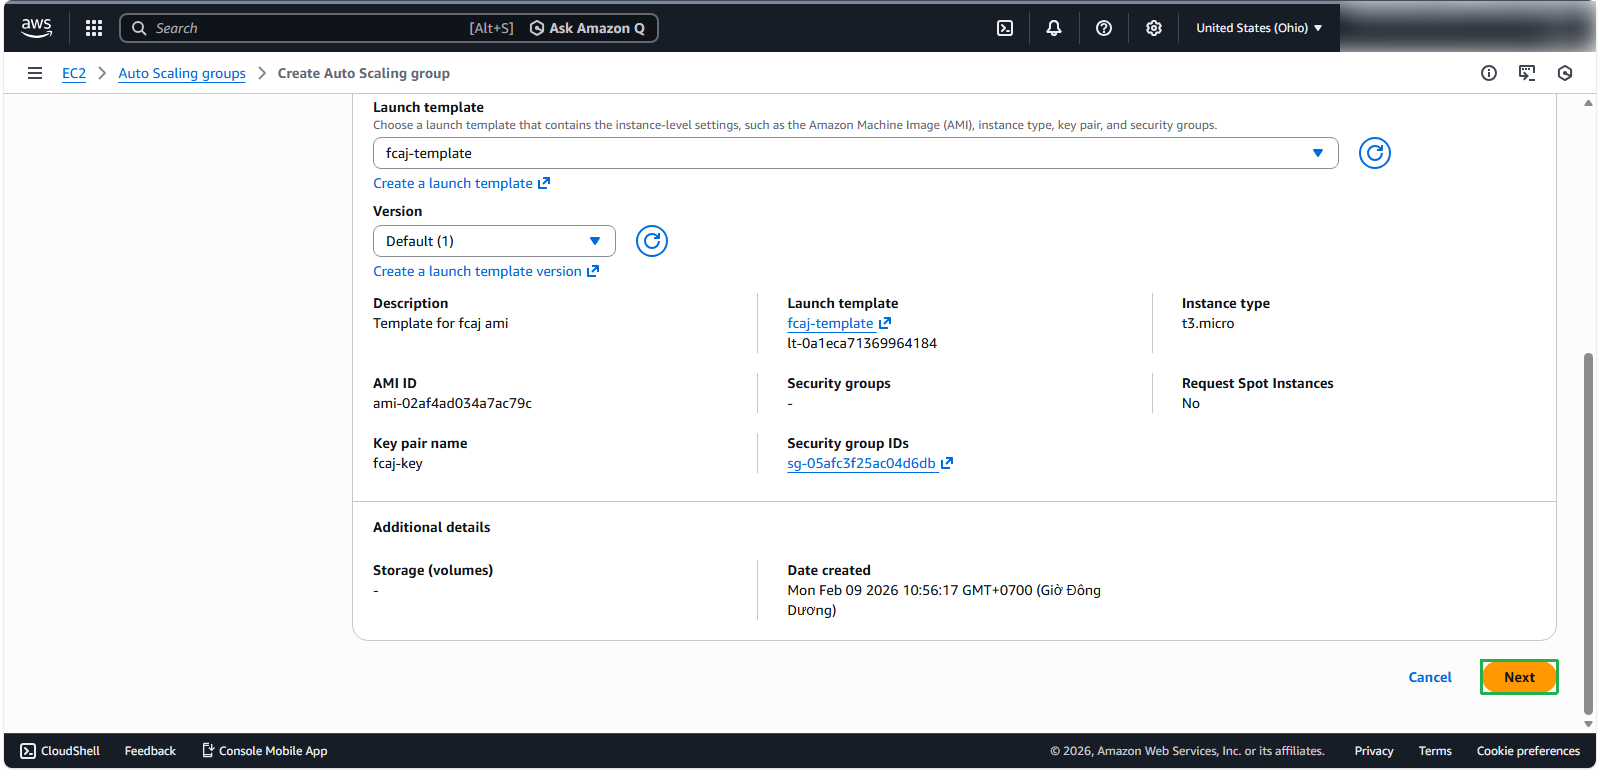
⚠️ Warning: The ASG name should match the name specified in section 2.6 for Predictive Scaling configuration. The launch template must include all required components (MySQL Client, Node.js, application source code, and PM2) for proper instance functionality.
Configuring Network Settings
- In the network configuration section:
- VPC: select AutoScaling-Lab
- Availability Zones and subnets: select all 3 public subnets
- Click Next
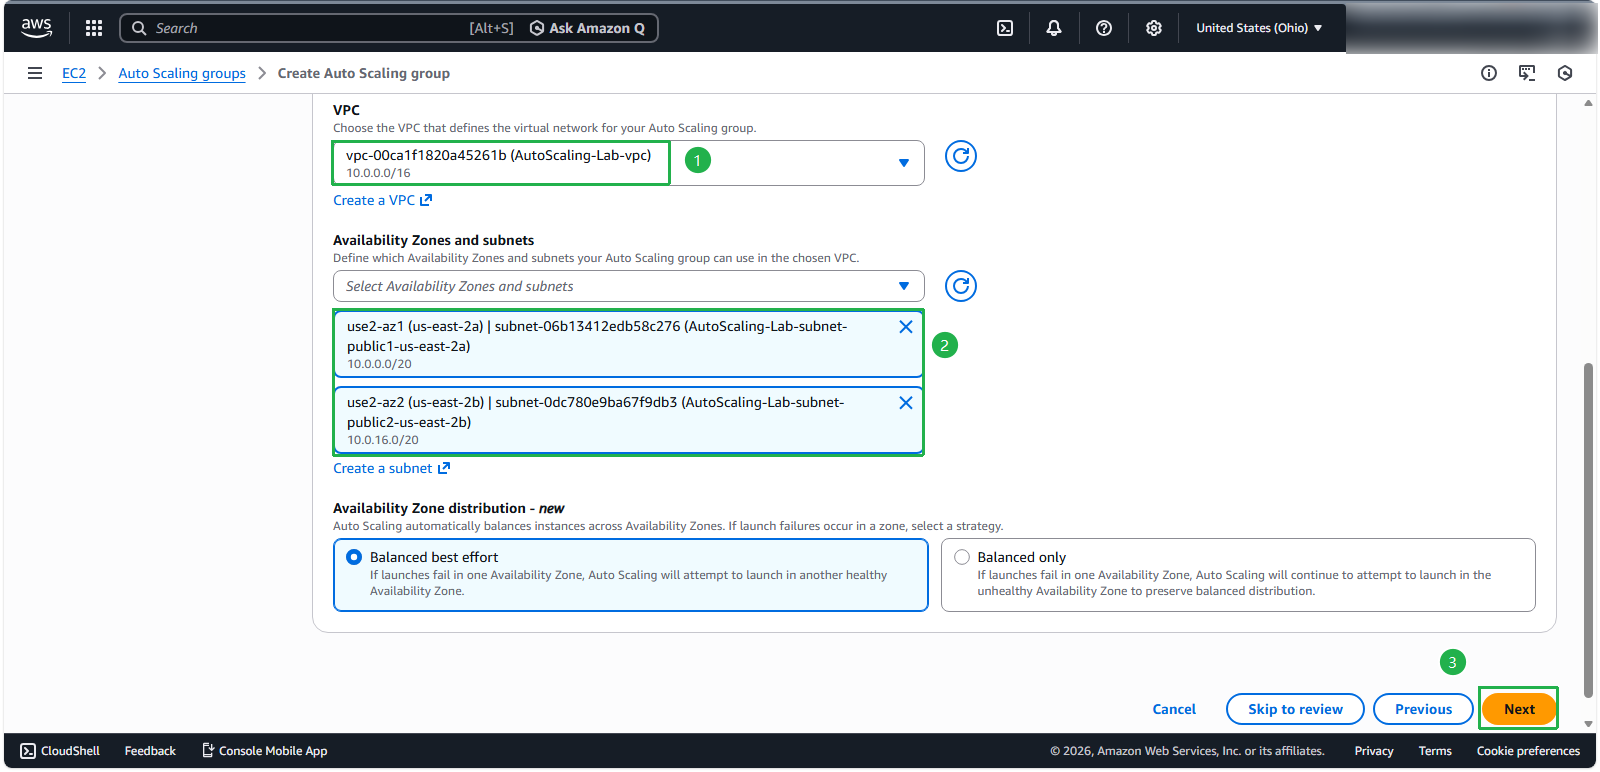
💡 Pro tip: Distributing instances across multiple Availability Zones improves application reliability. If one AZ experiences issues, instances in other AZs continue serving traffic.
Configuring Load Balancer Integration
- Connect your Auto Scaling Group to the previously created load balancer:
- Load balancing: select Attach to an existing load balancer
- Attachment method: choose Choose from your load balancer target groups
- Target group: select fcaj-asg HTTP
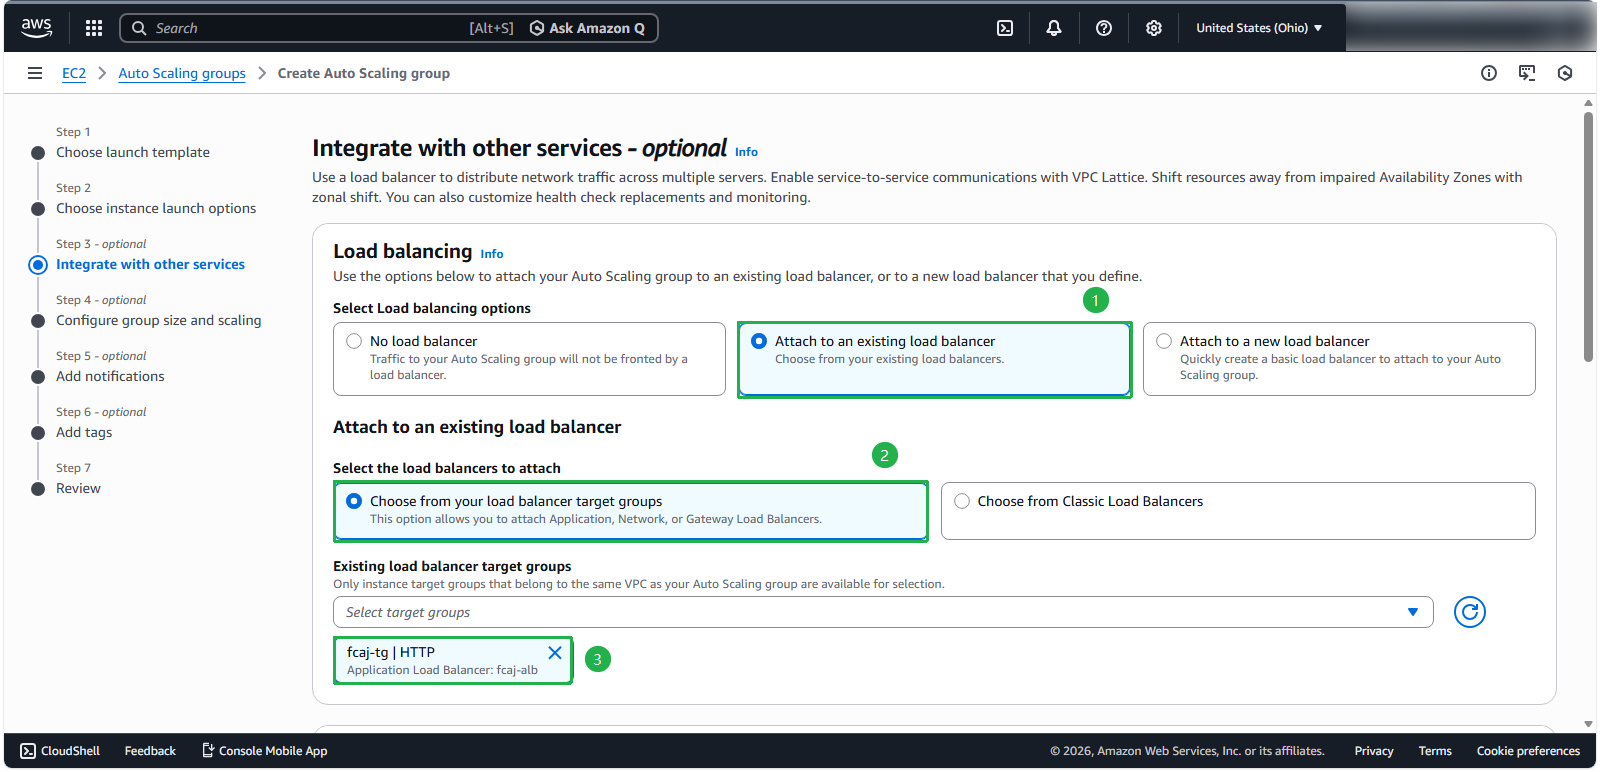
ℹ️ Information: When properly configured, the dropdown will display your existing target group, confirming that both the Application Load Balancer and Target Group are correctly set up.
- For additional configuration:
- Health checks: enable Turn on Elastic Load Balancing health checks
- Leave remaining health check settings as default
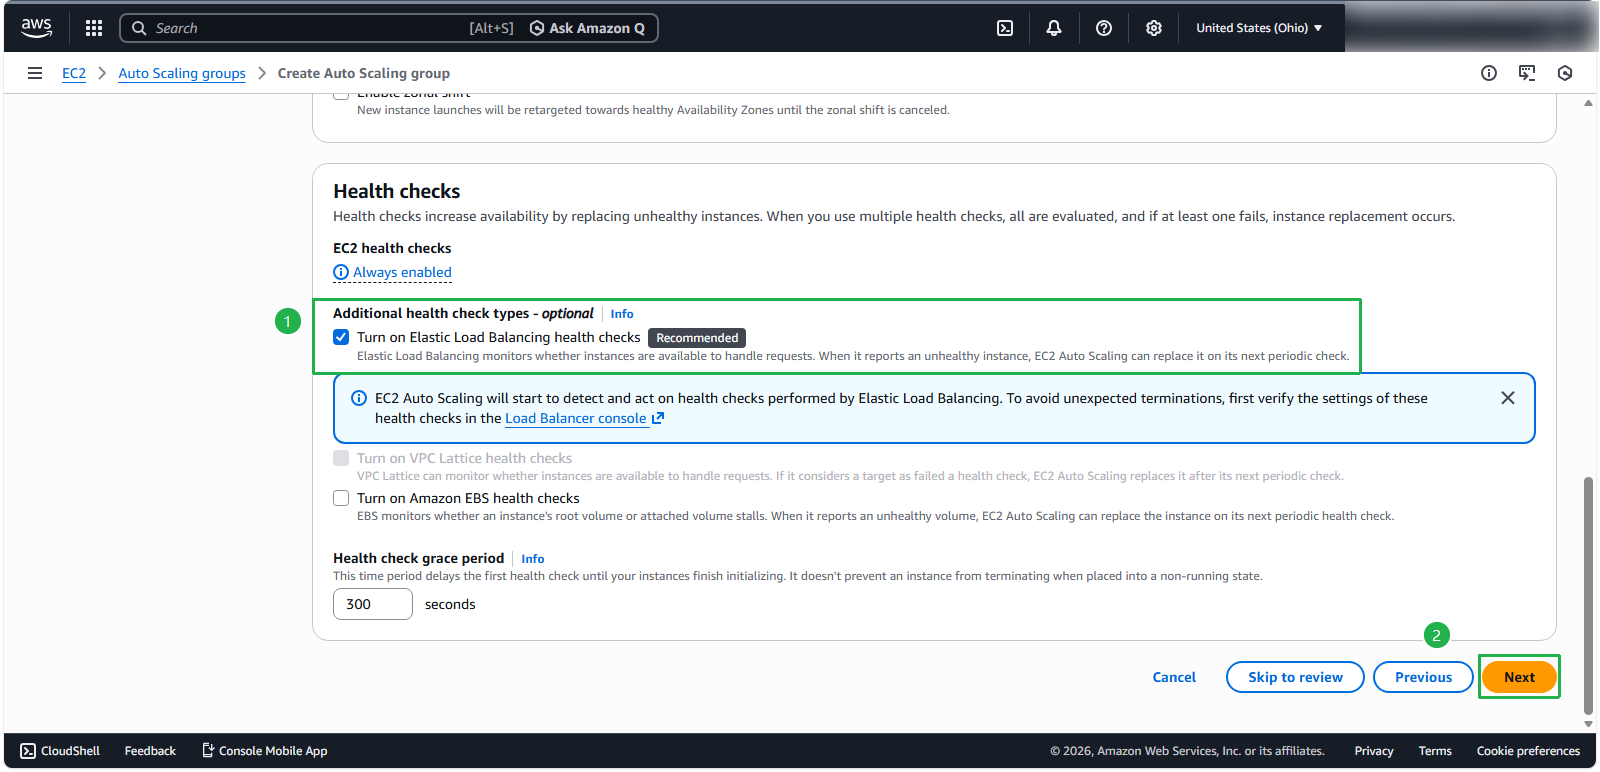
Configuring Group Size and Scaling Policies
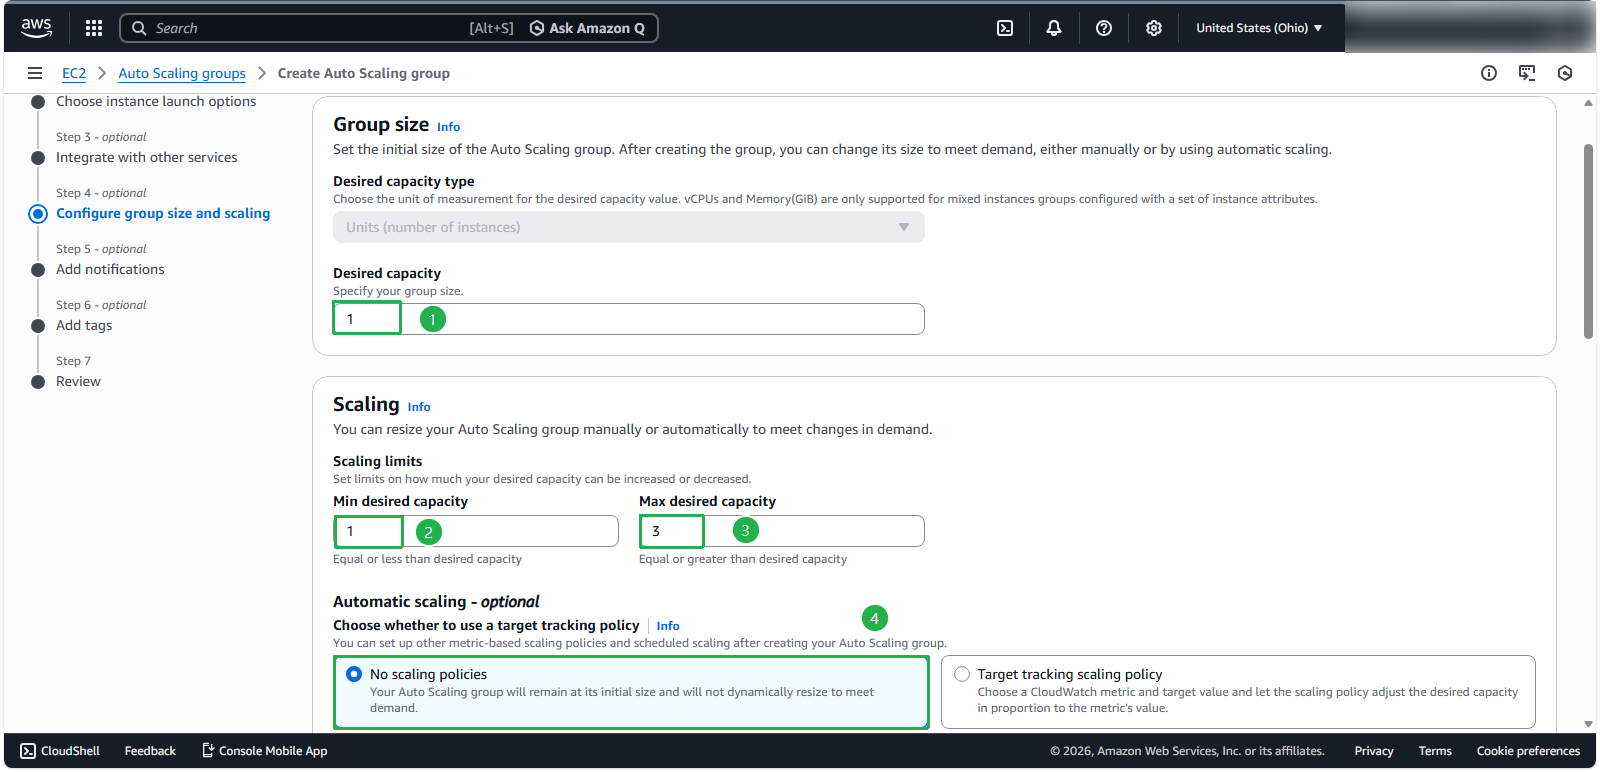
- Define the initial capacity and scaling boundaries:
- Group size:
- Desired capacity: 1
- Scaling limits:
- Minimum capacity: 1
- Maximum capacity: 3
- Scaling policies: No scaling policies (we’ll configure these in later sections)
ℹ️ Information: We’re deferring scaling policy configuration because we’ll implement and compare multiple scaling strategies in subsequent sections.
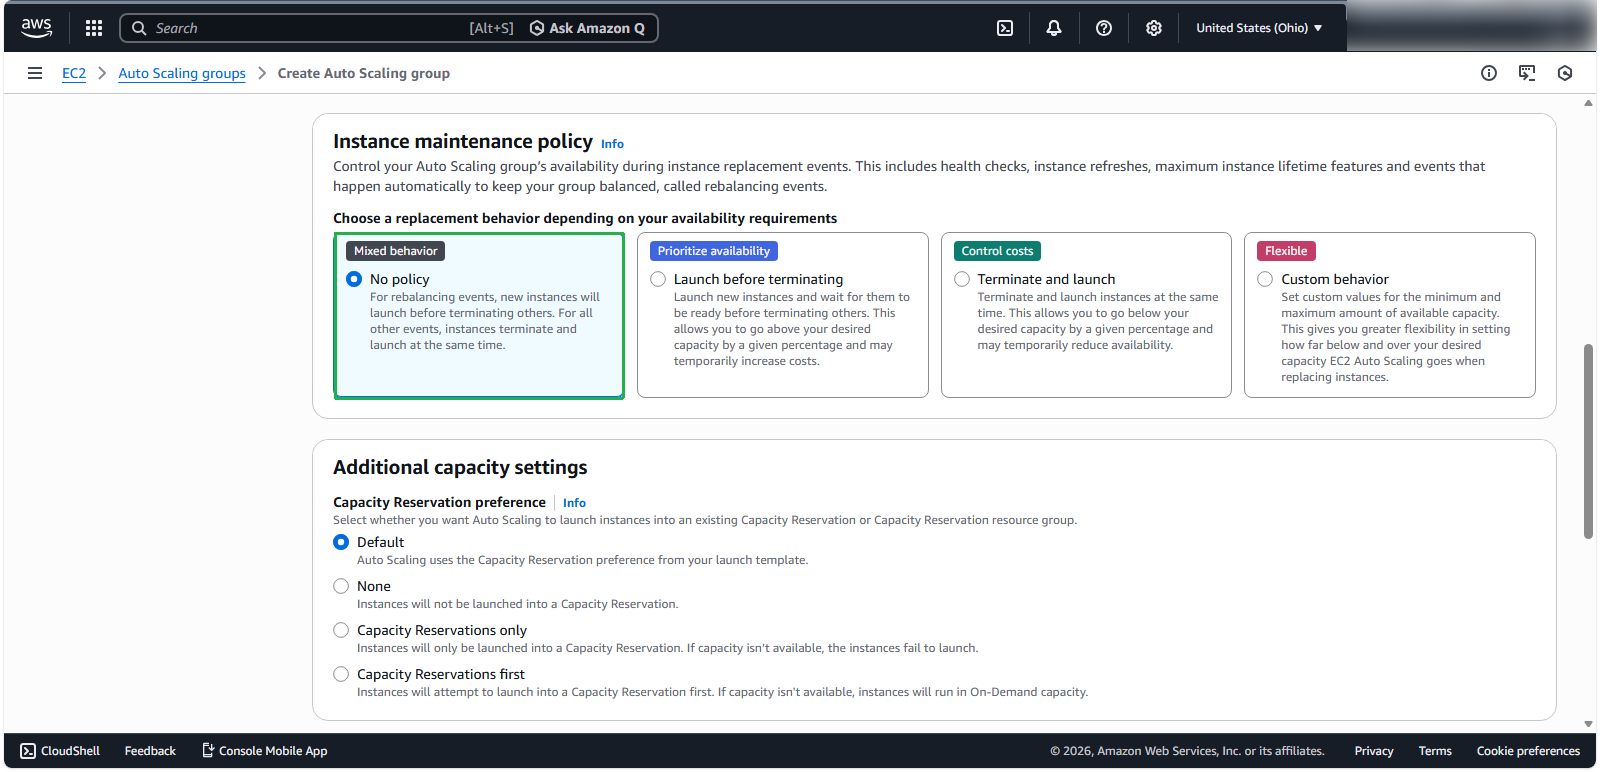
For instance maintenance: Select No policy
Under Monitoring:
- Select Enable group metrics collection within CloudWatch
- Click Next
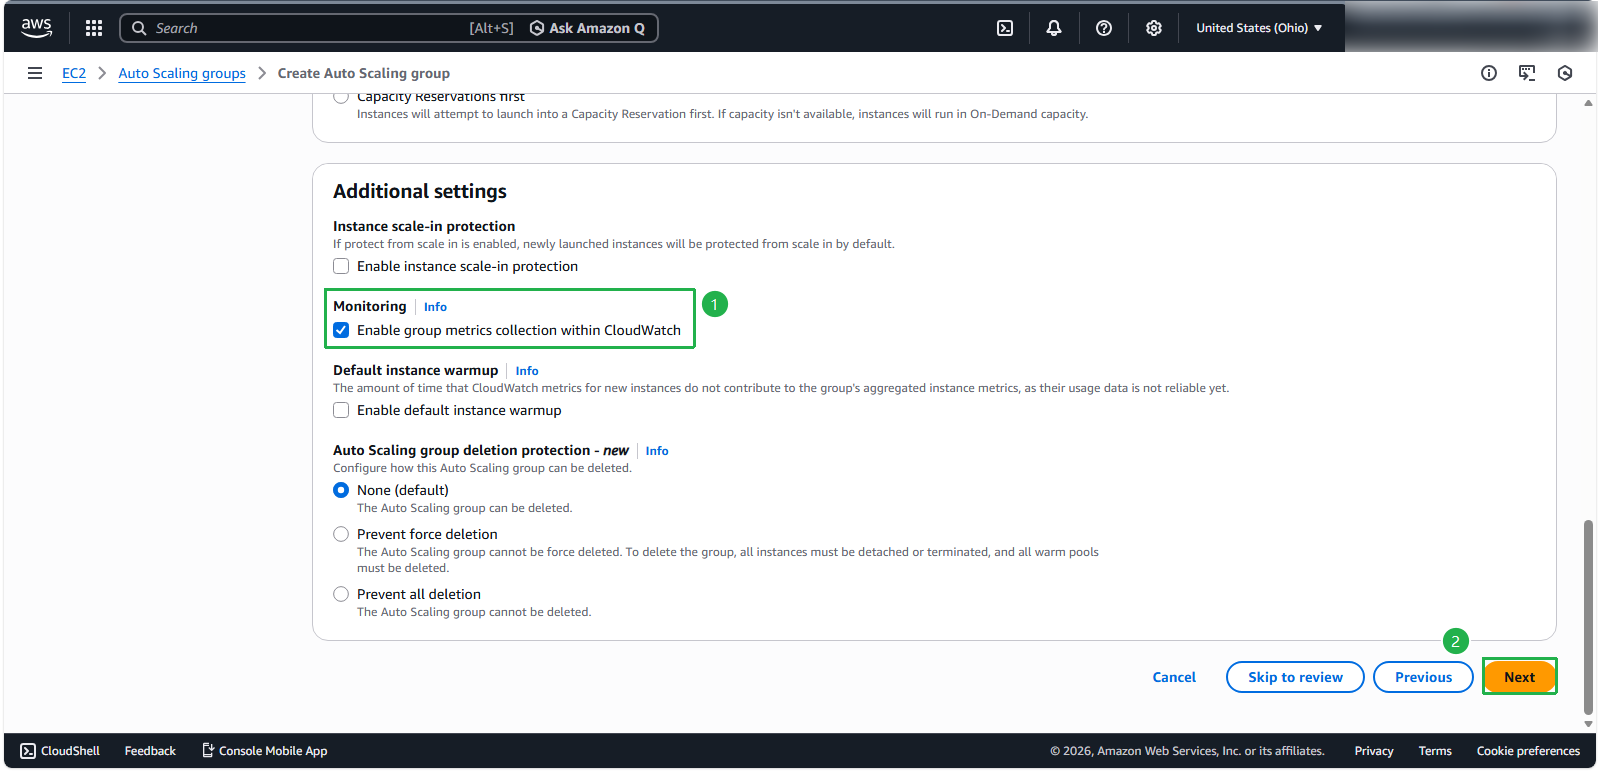
Configuring Notifications
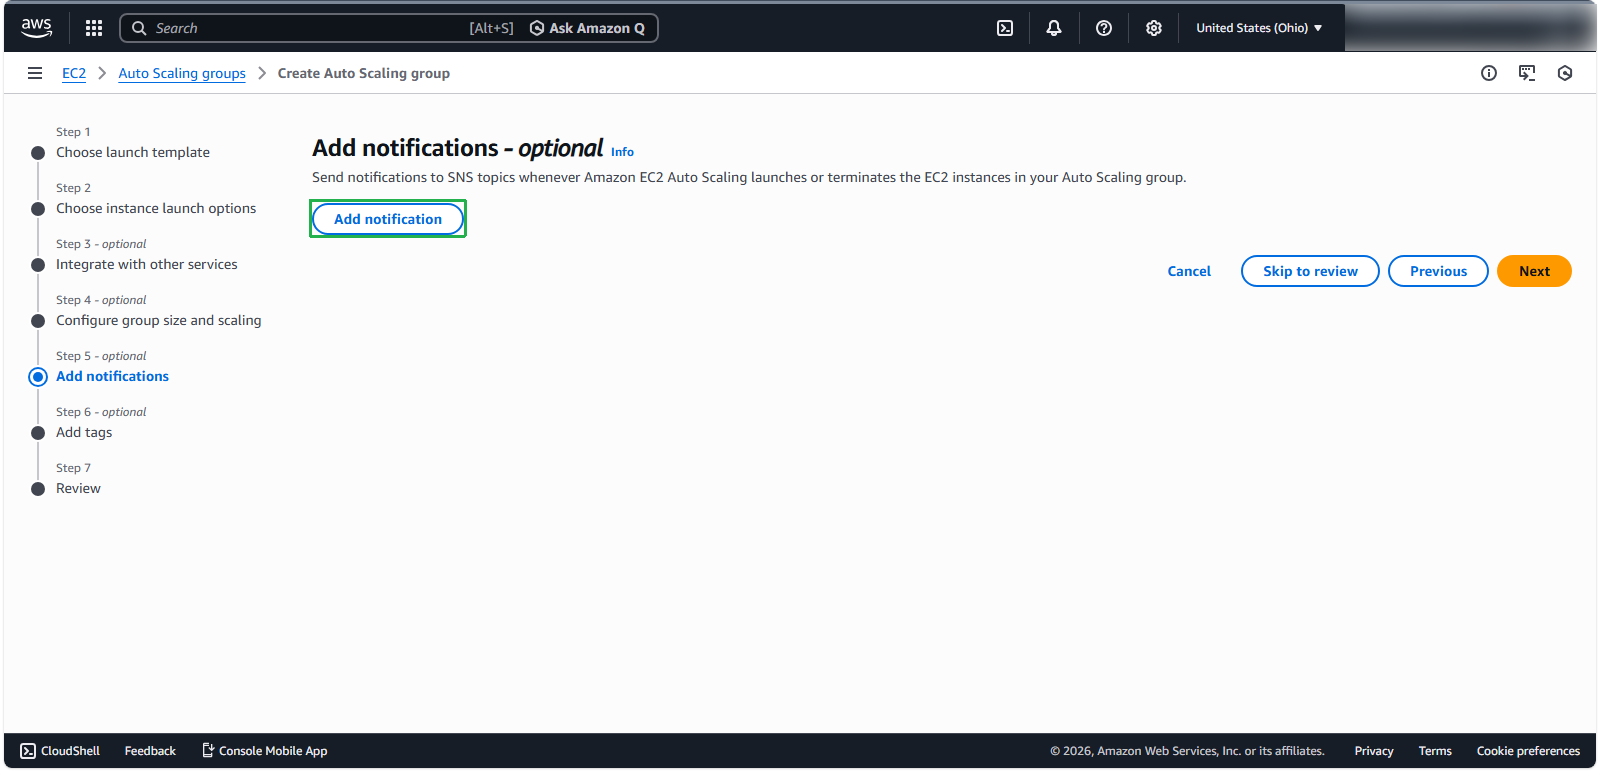
Set up Amazon SNS notifications to monitor Auto Scaling events:
Click Add notification
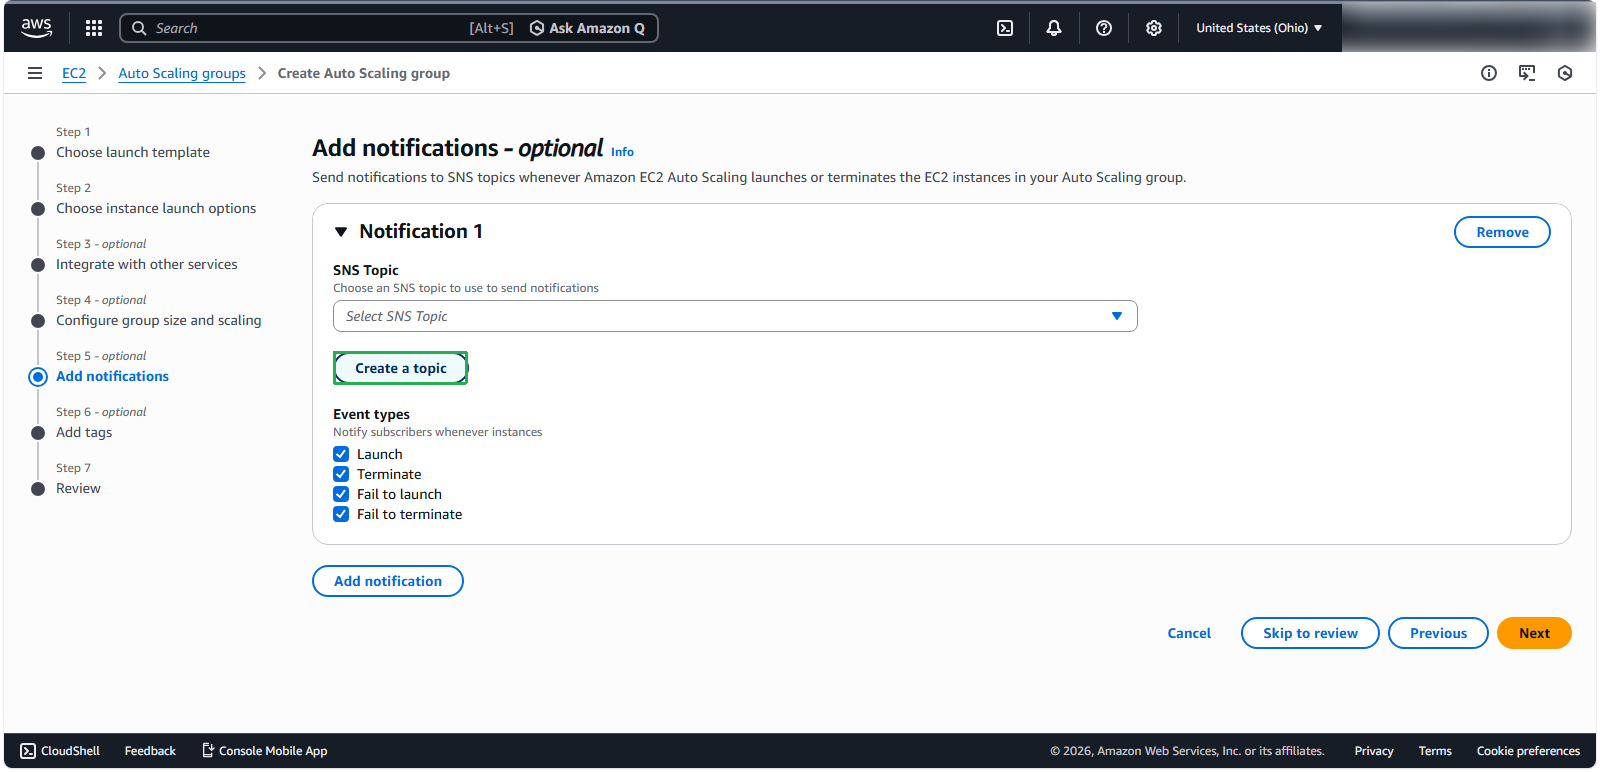
Click Create a topic
Notification configuration:
- SNS topic:
asg-topic - Recipients: enter your email address
- Event types: select all event types
- SNS topic:
Click Next
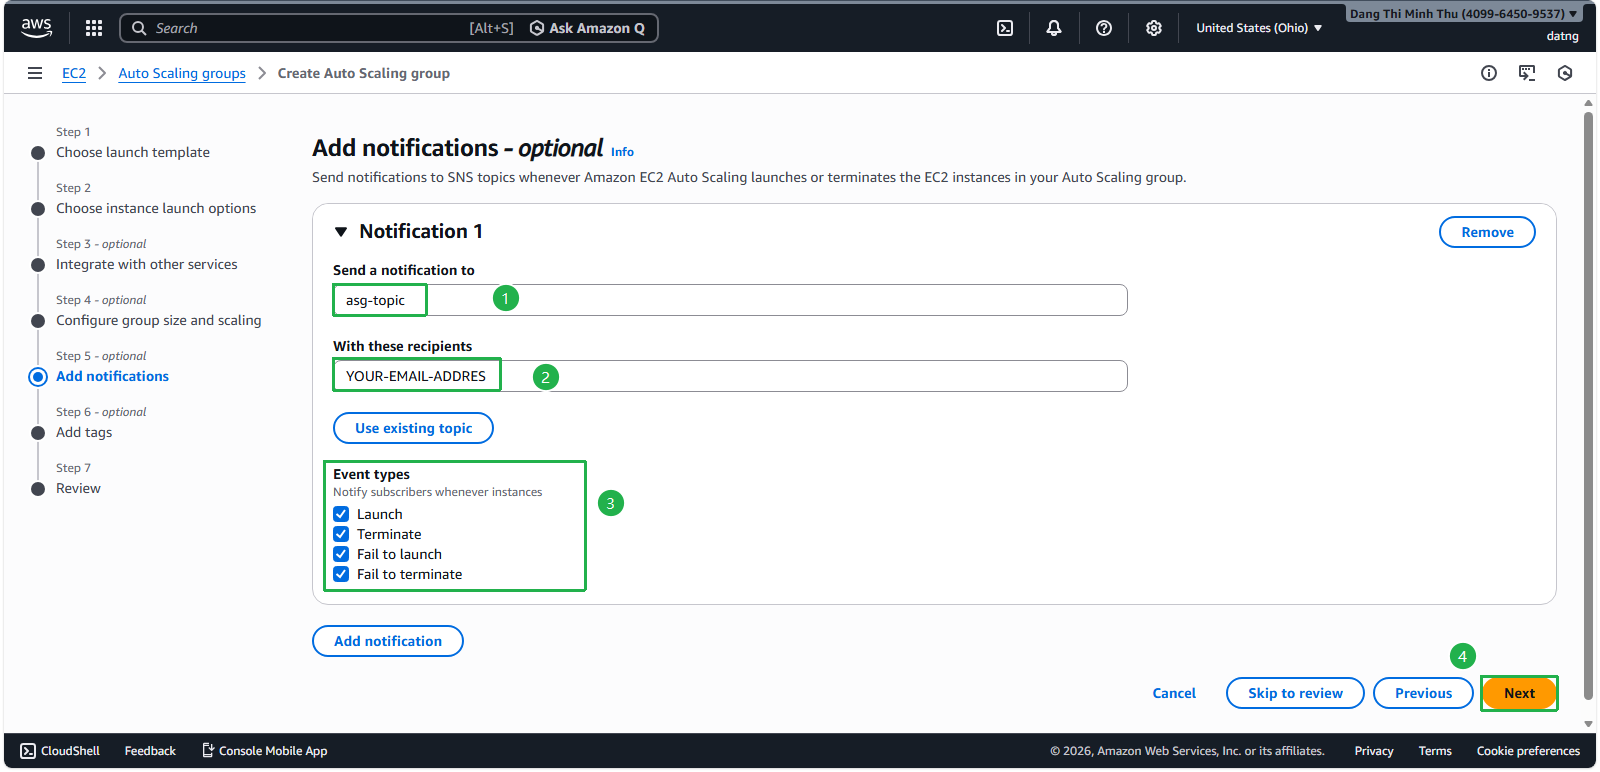
Click Next
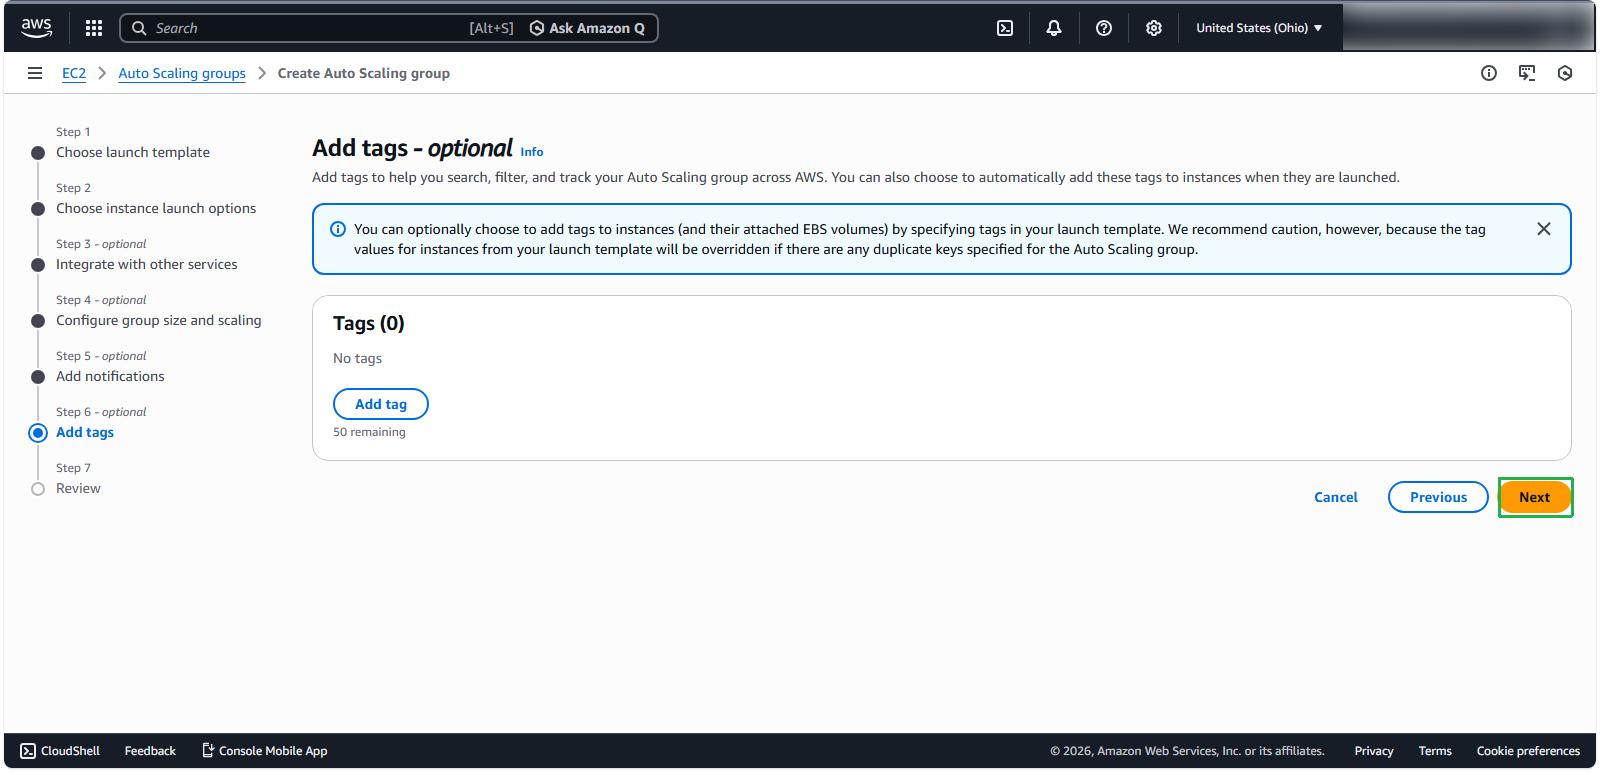
Review your configuration and click Create Auto Scaling group.
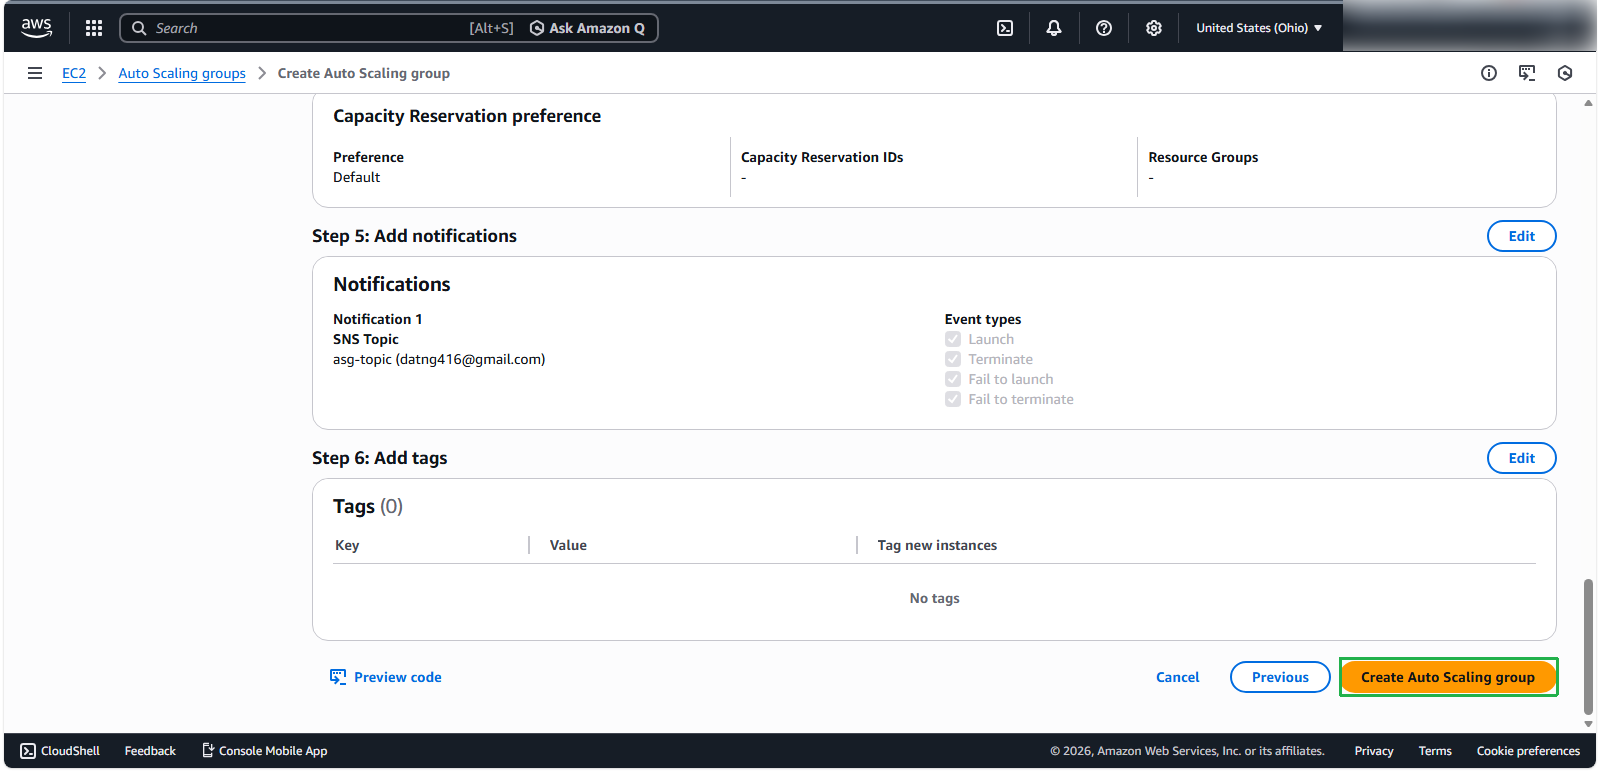
🔒 Security Note: Notifications provide real-time awareness of scaling events, helping you monitor for unexpected behavior that could indicate security issues or application problems.
Verifying Auto Scaling Group Creation
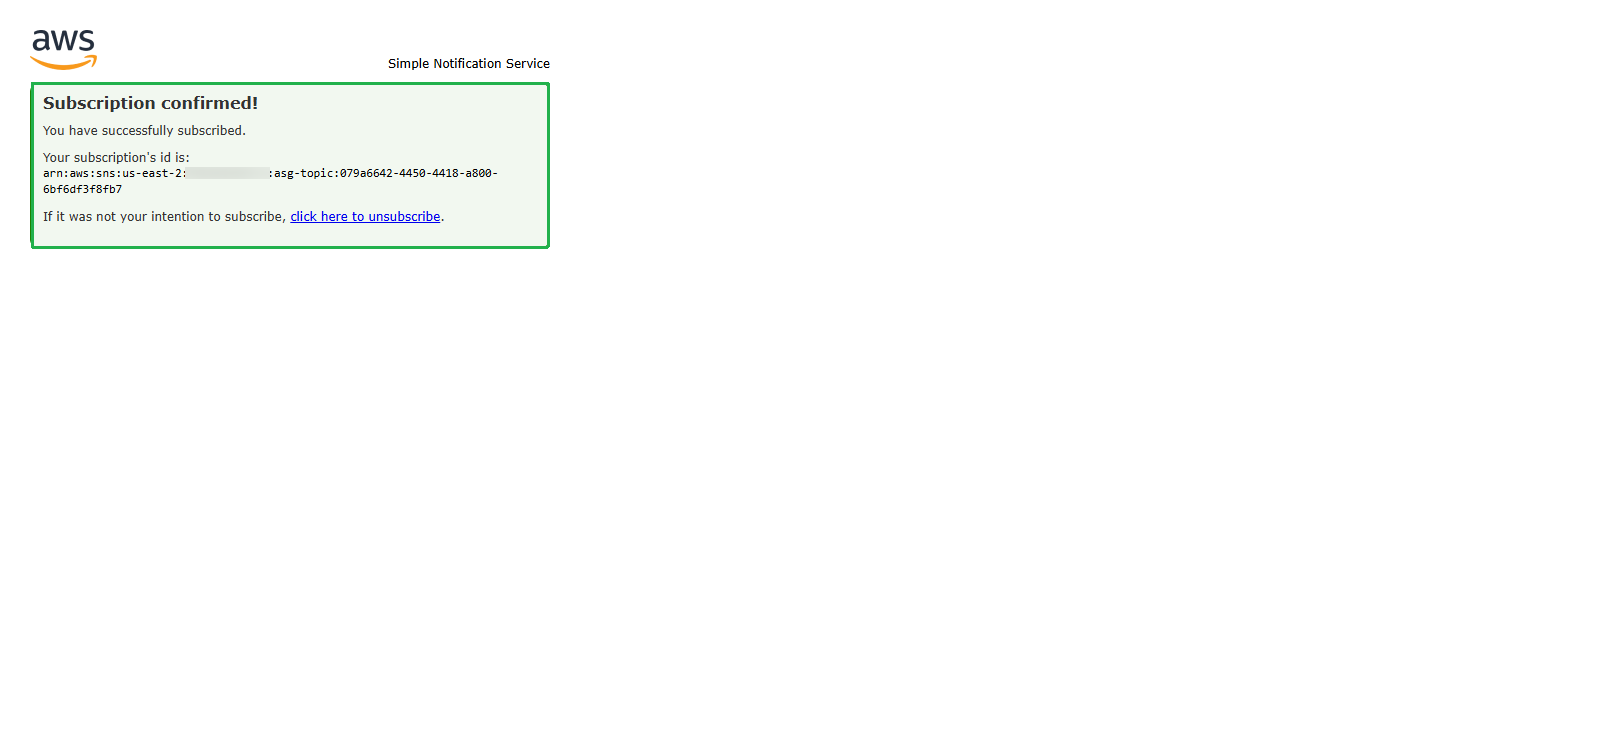
After creation, you’ll receive confirmation emails. Click Confirm subscription. Then, you see a confirmation.
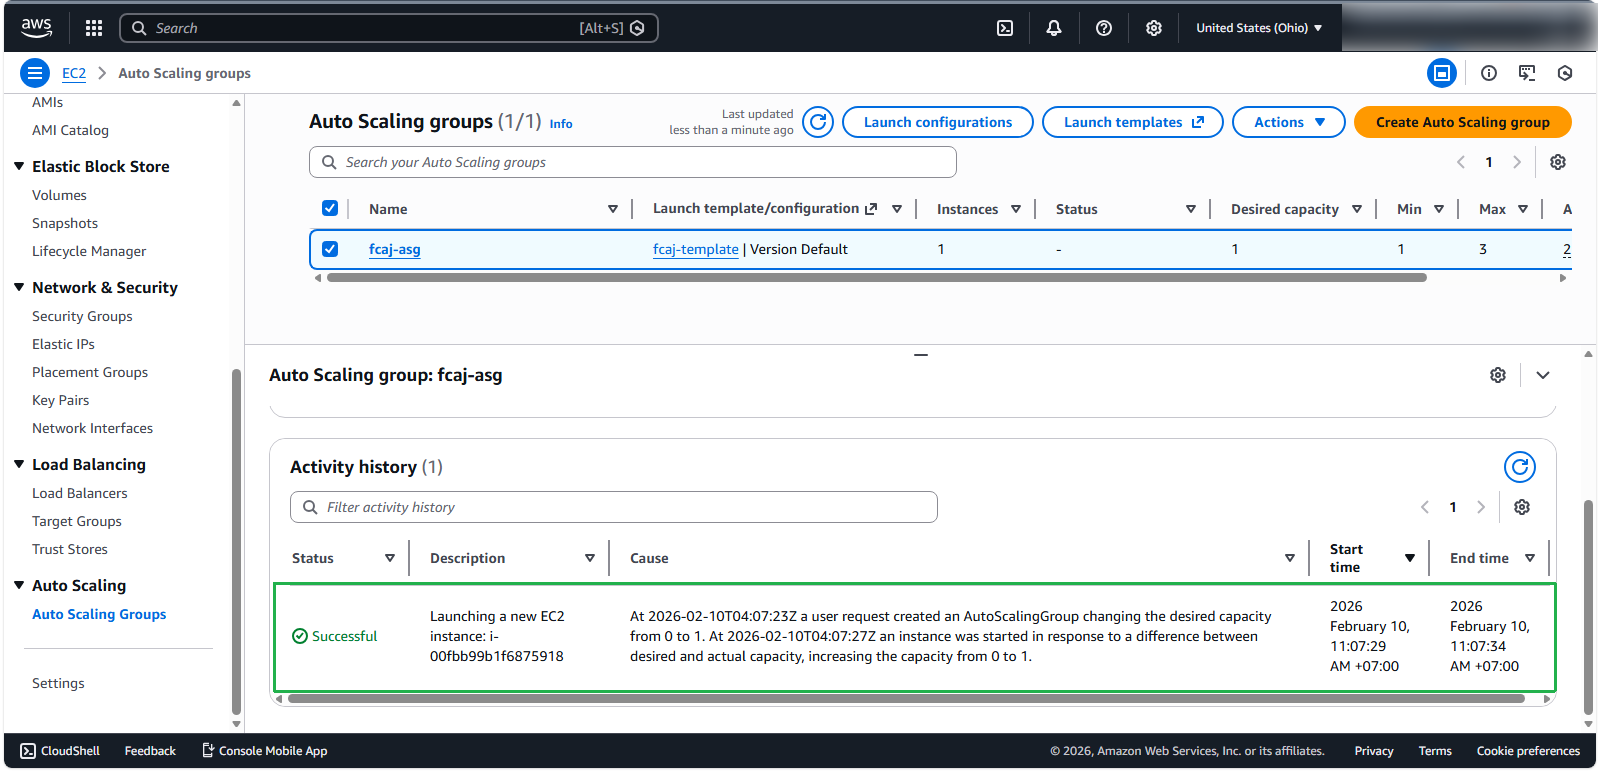
Verify the Auto Scaling activity in the AWS Management Console:
Select your Auto Scaling Group. Navigate to the Activity tab to view scaling events
⚠️ Warning: As we implement different scaling strategies in subsequent sections, you may receive numerous notification emails. This is intentional to help you monitor scaling activities.
💡 Pro tip: Auto Scaling Groups work best when combined with CloudWatch alarms that trigger scaling actions based on metrics like CPU utilization, network traffic, or custom application metrics. We’ll explore these options in upcoming sections.