Create Load Balancer
Create Load Balancer
-
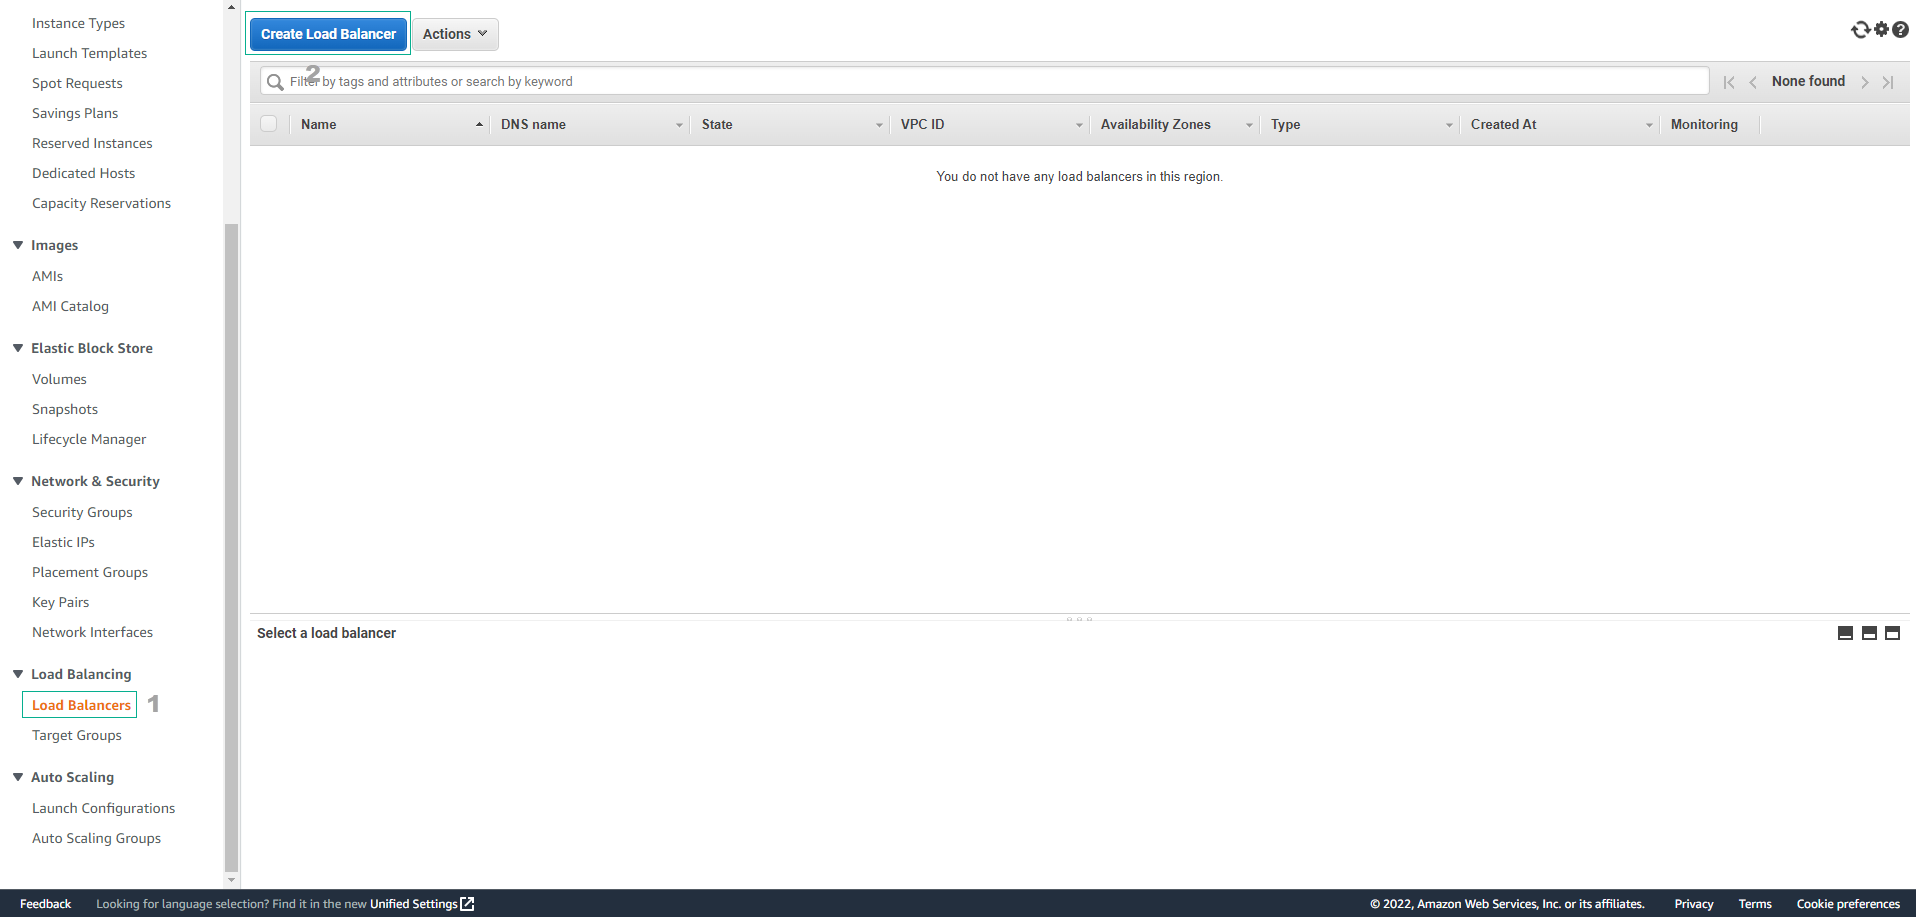
Access to EC2
- Select Load Balancers
- Select Create Load Balancer
-
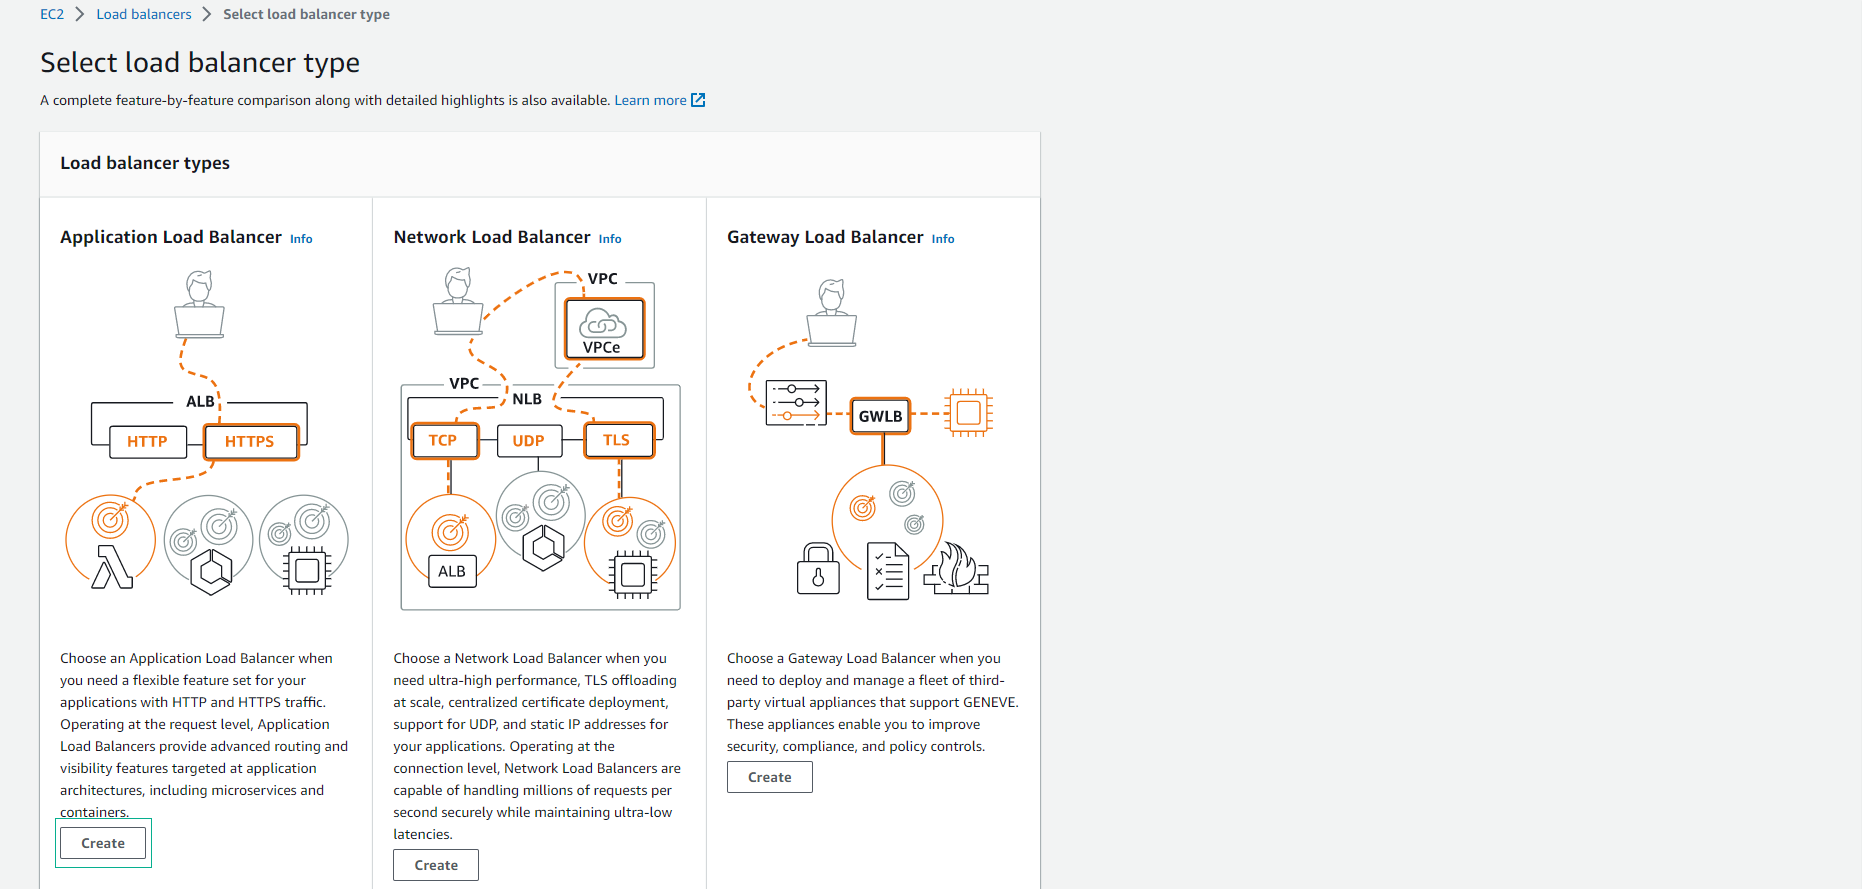
Section Load balancer types
- Select HTTP/HTTPS
- Select Create
-
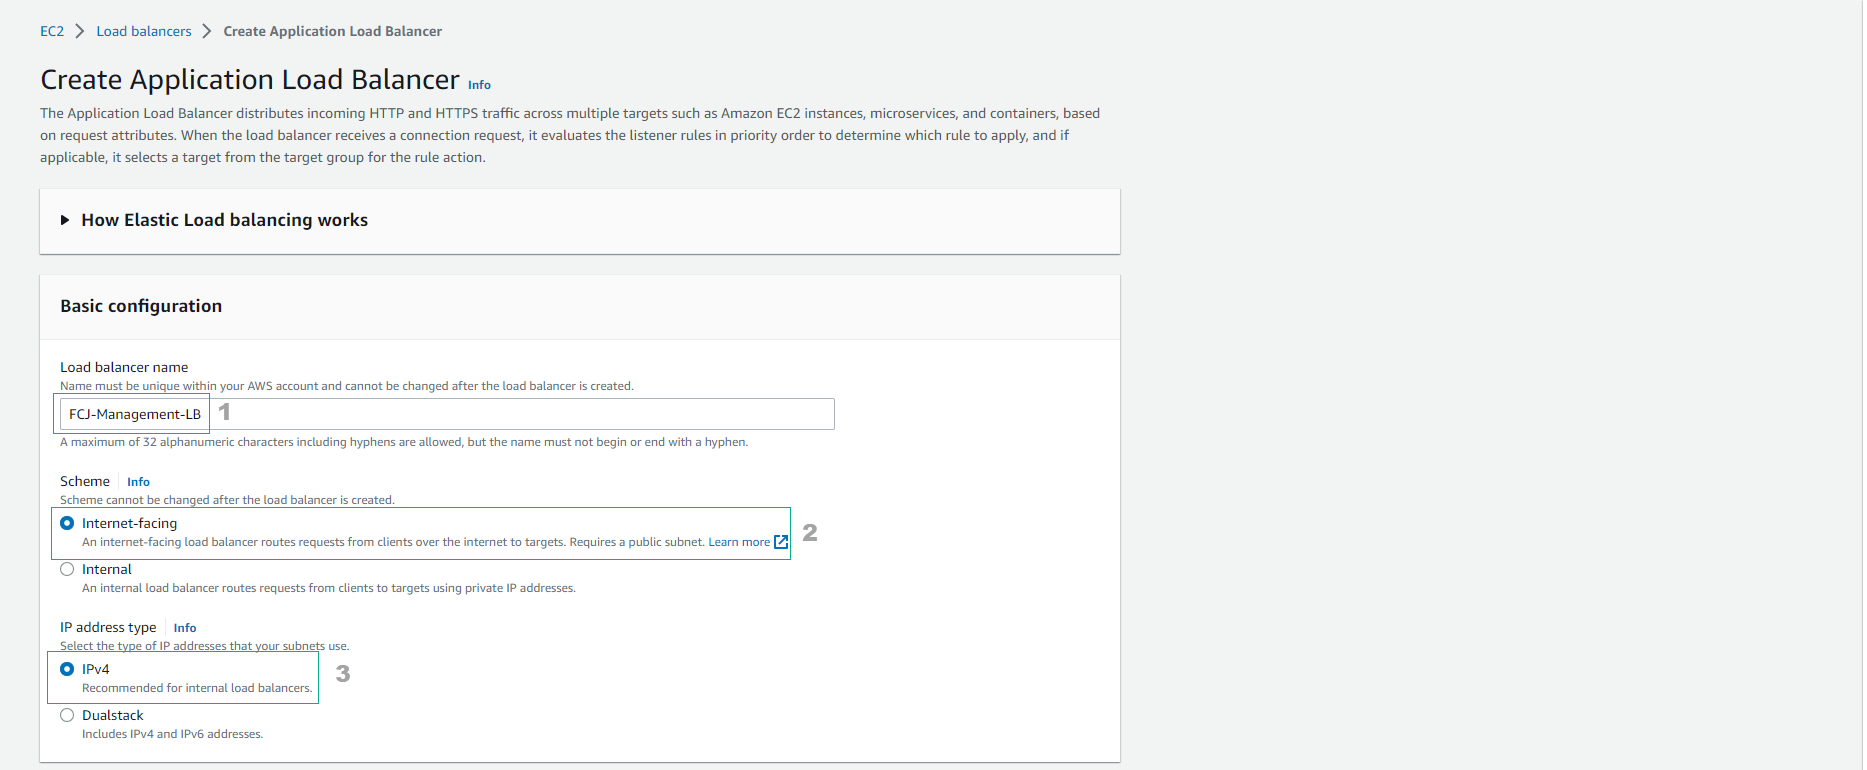
In the Create Application Load Balancer interface
- Load balancer name, enter
FCJ-Management-LB - Scheme, select Internet-facing
- IP address type, select IPv4
- Load balancer name, enter
-
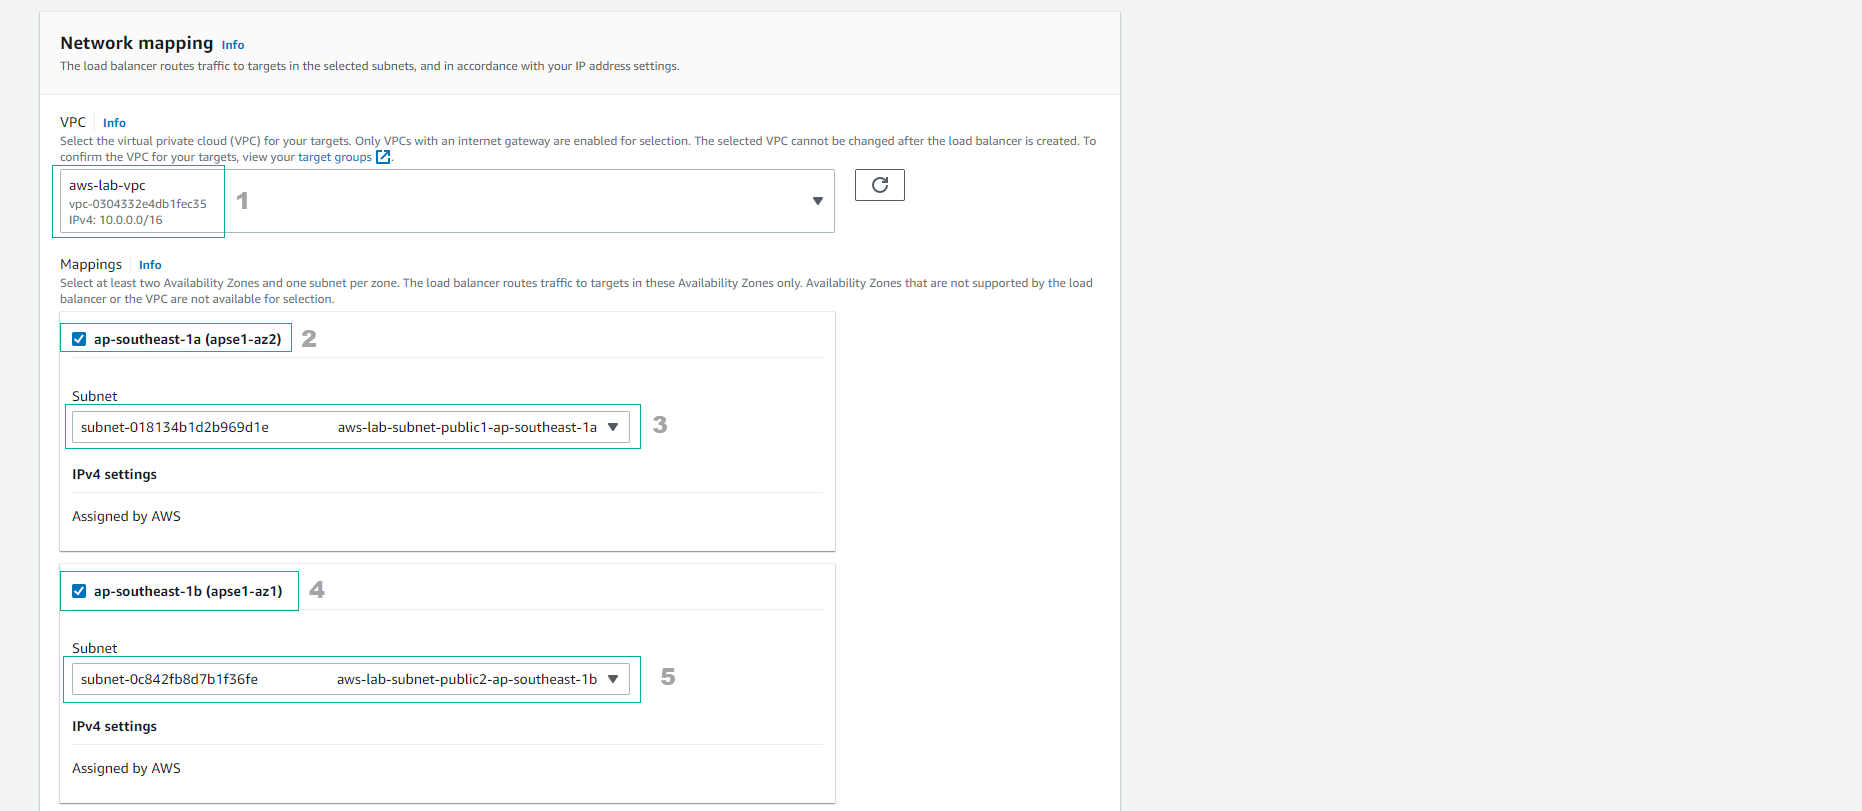
Configure Network mapping
- VPC, select the VPC created in the lab.
- Mapping, select ap-southeast-1a and ap-southeast-1b
- Select subnet
-
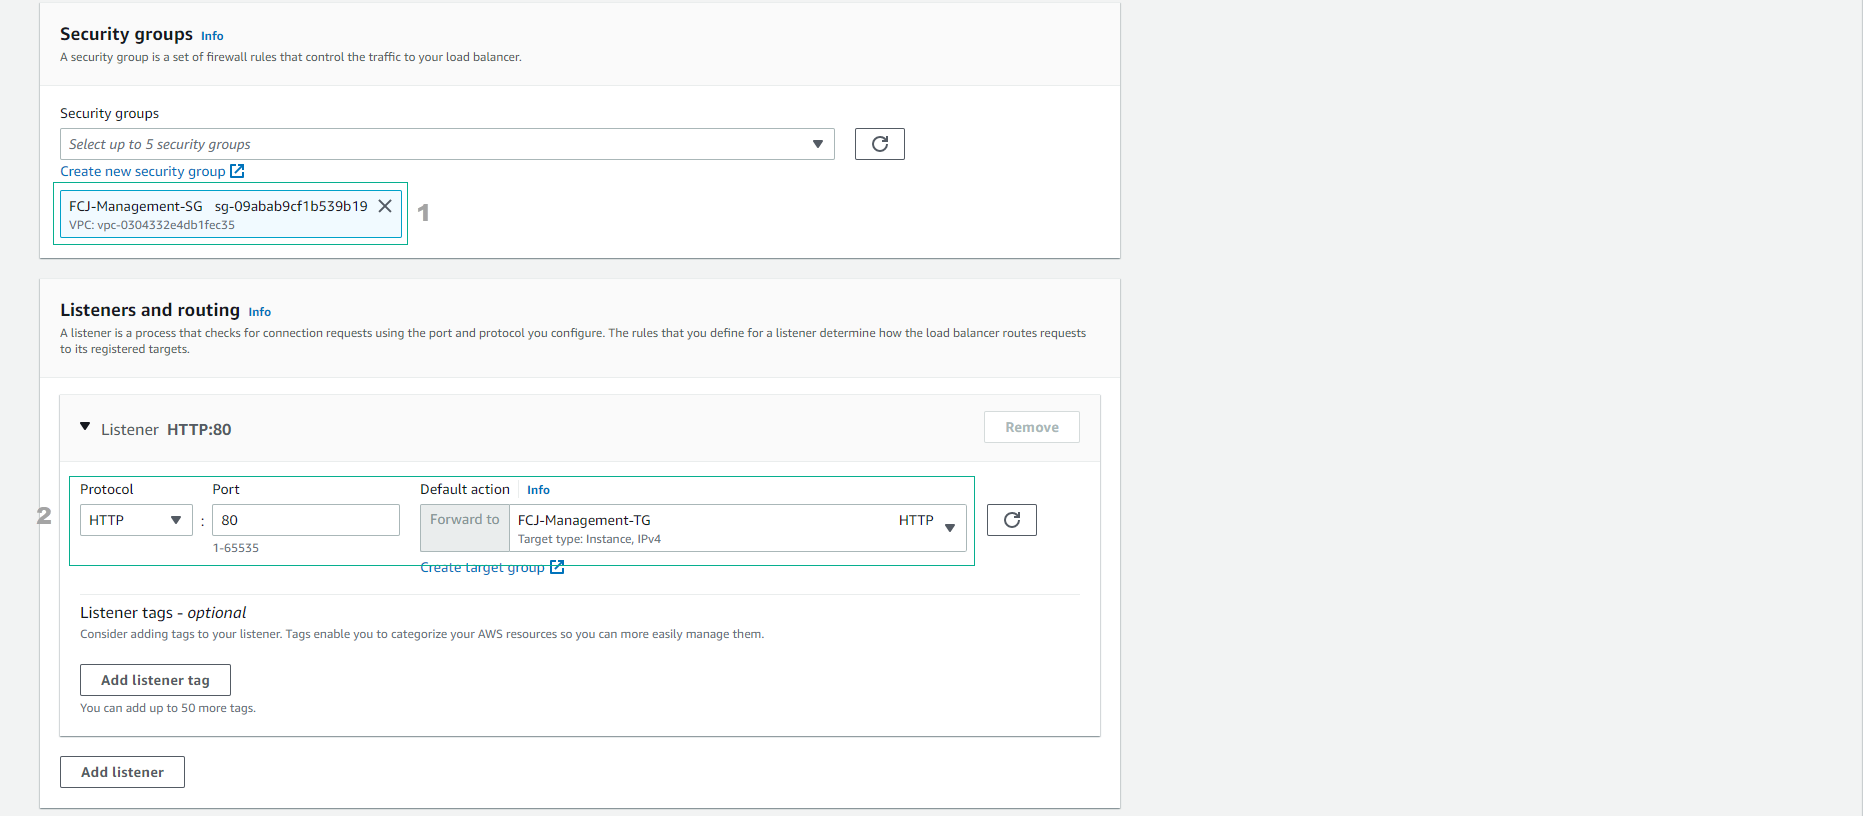
Configure security group, select FCJ-Management-SG.
- Section Listeners and routing, in Default actions select FCJ-Management-TG
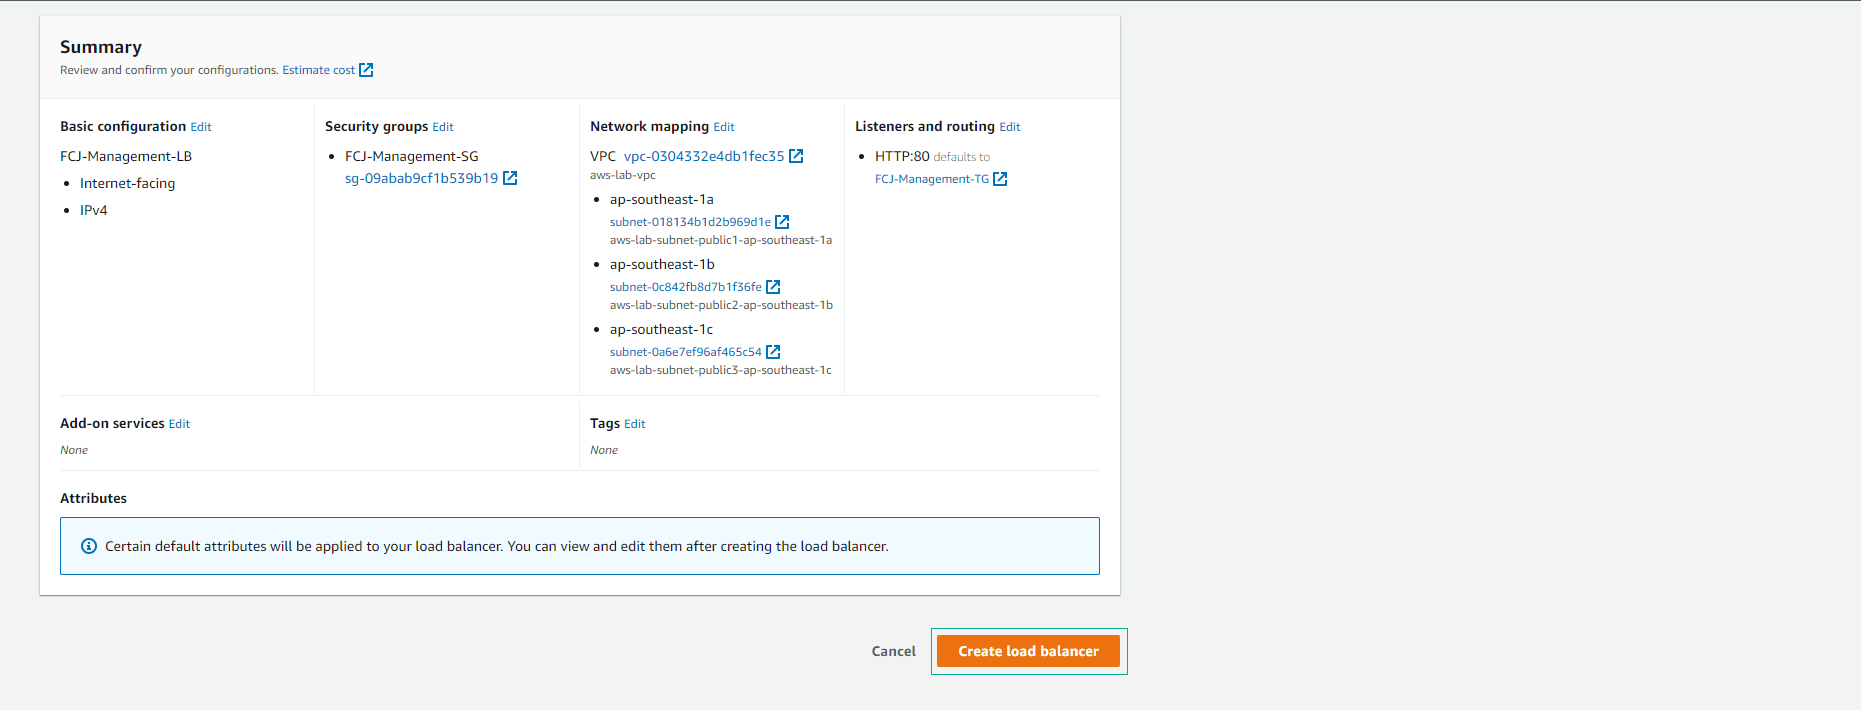
- Check again and select Create load balancer
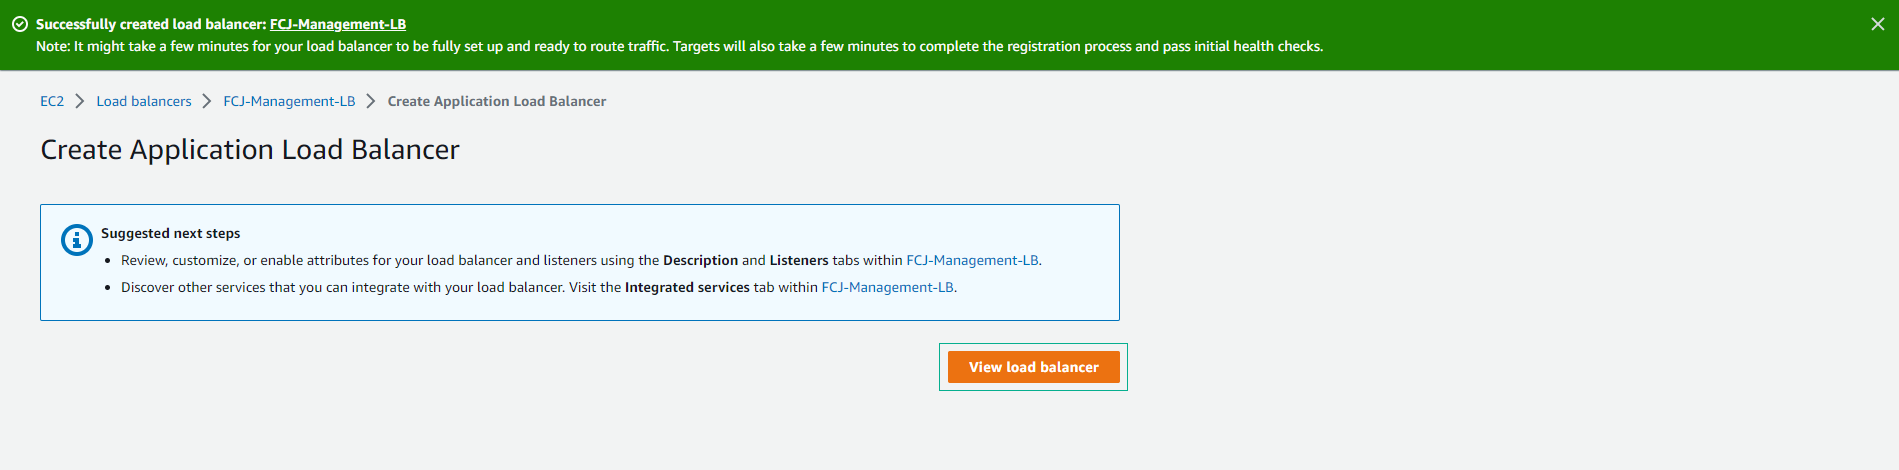
- Create Application Load Balancer successfully and select View load balancer
-
In the Load Balancer interface. The Load Balancer creation process will take about 5-10 minutes to complete. You can check the status change from provisioning to active in the Load Balancer list.
- Select FCJ-Management-LB
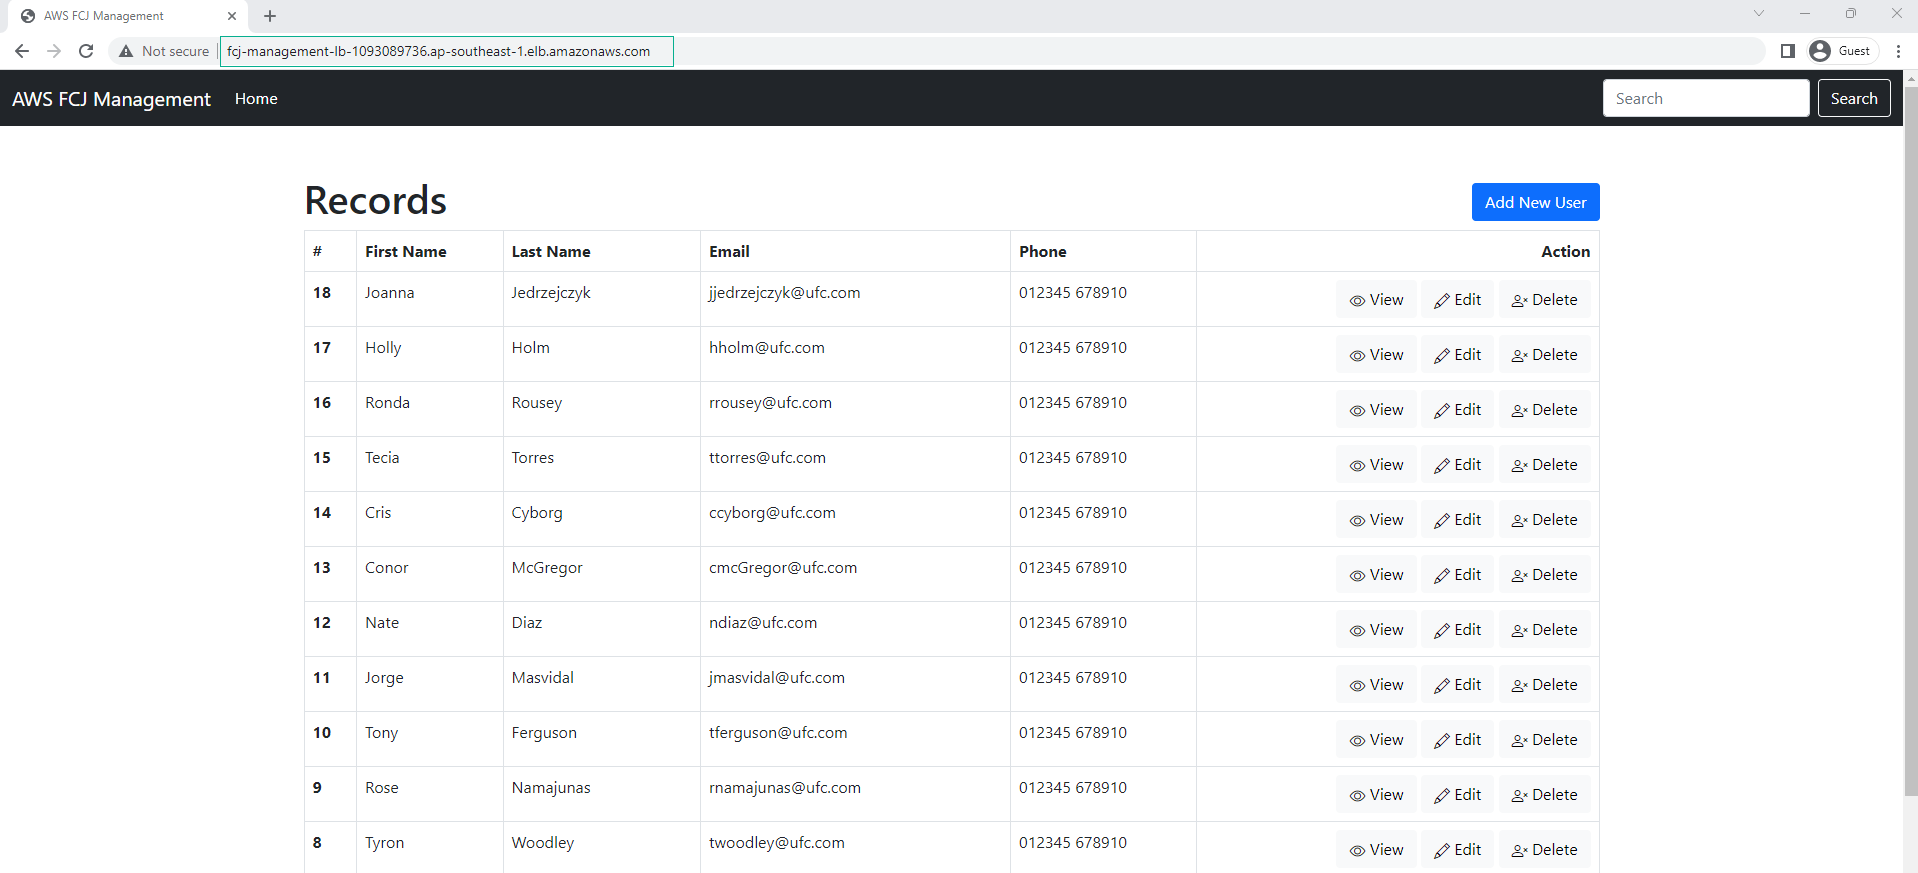
- Copy DNS name of Load Balancer.
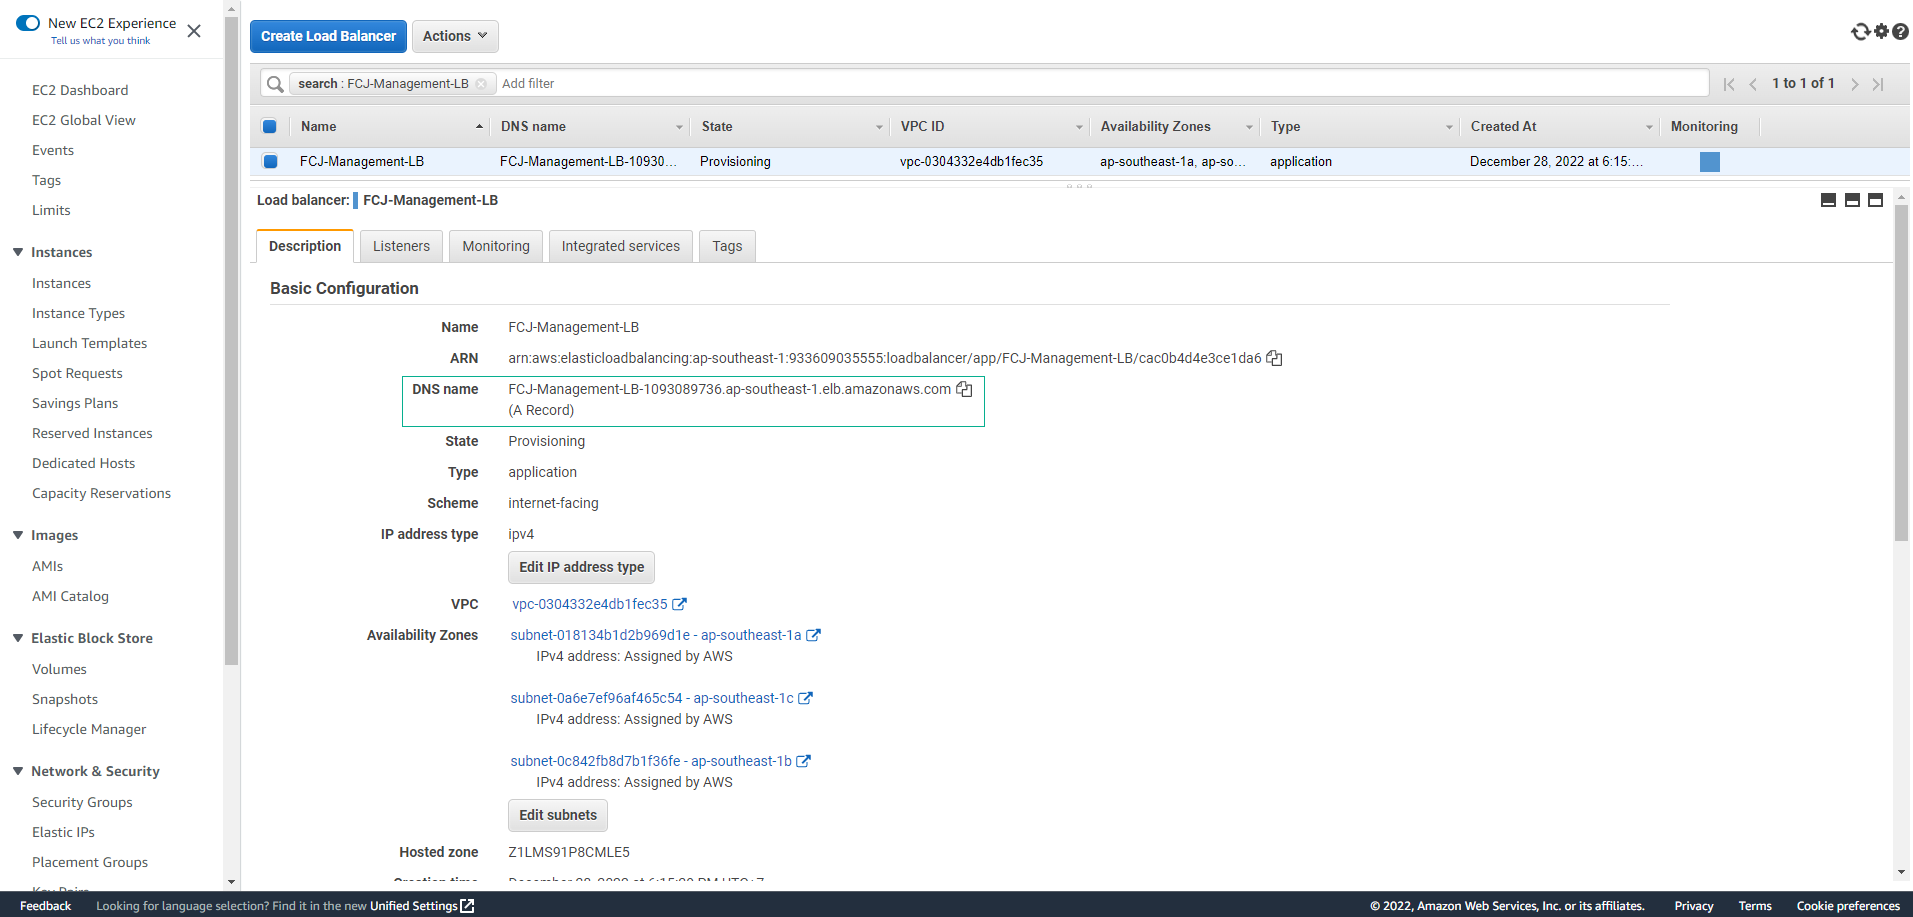
- Access by pasting DNS name into the browser. However, at the moment we only have a single EC2 server.
Next, we will proceed to configure the Auto Scaling Group feature, which will automatically increase the number of our EC2 instances when the traffic is high.